


Heron's Perch Golf Club - My first course is Live!
Jan 11, 2021 21:17:18 GMT -5
Crazycanuck1985 and bennyk315 like this
Post by FranzNotHans on Jan 11, 2021 21:17:18 GMT -5
My first published course, Heron's Perch Golf Club, went live last weekend!
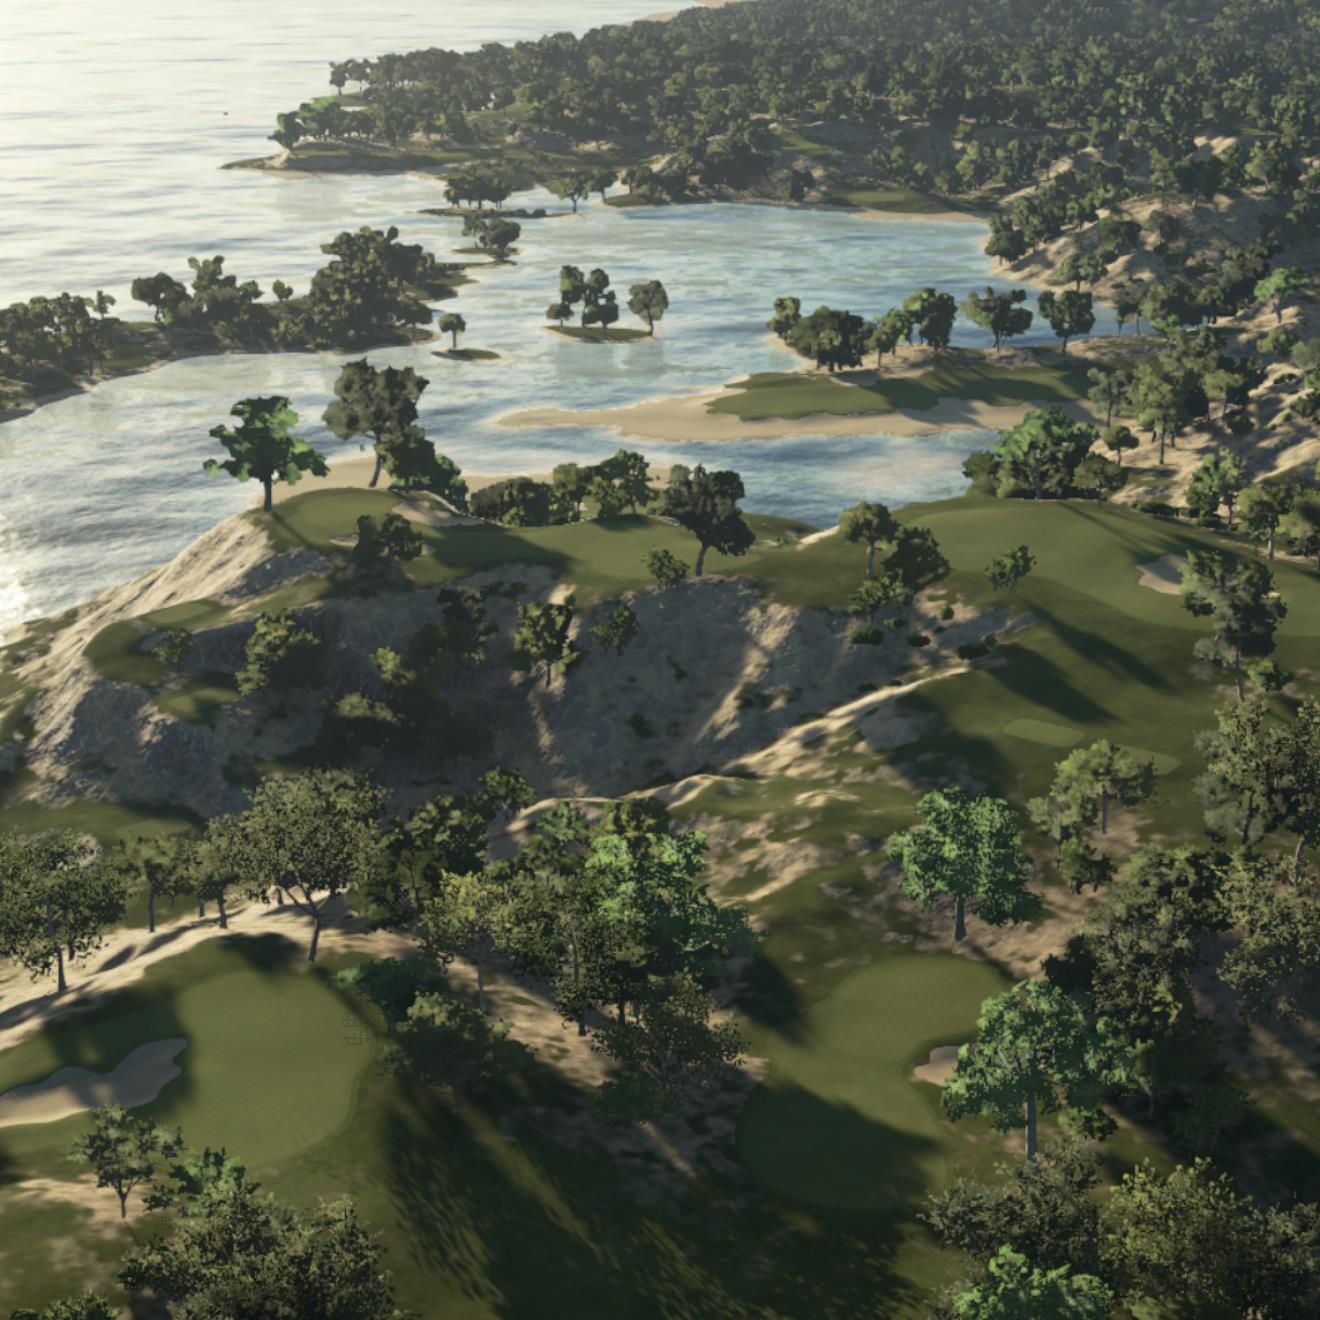
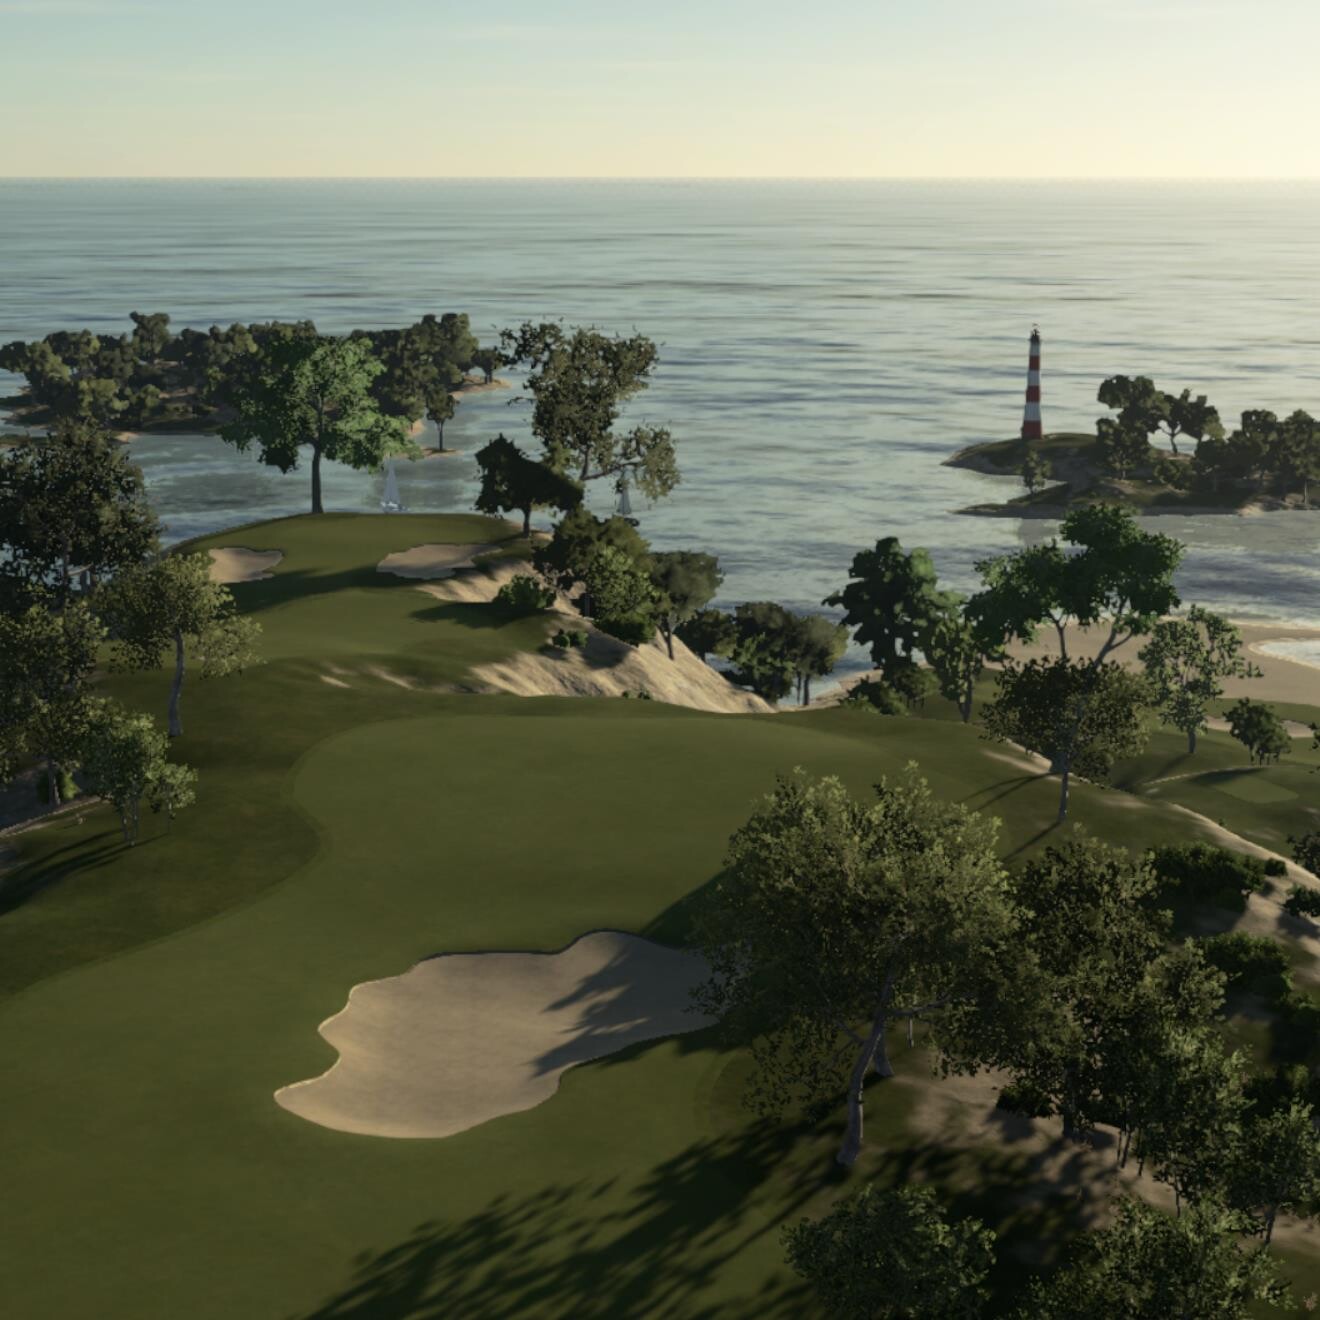
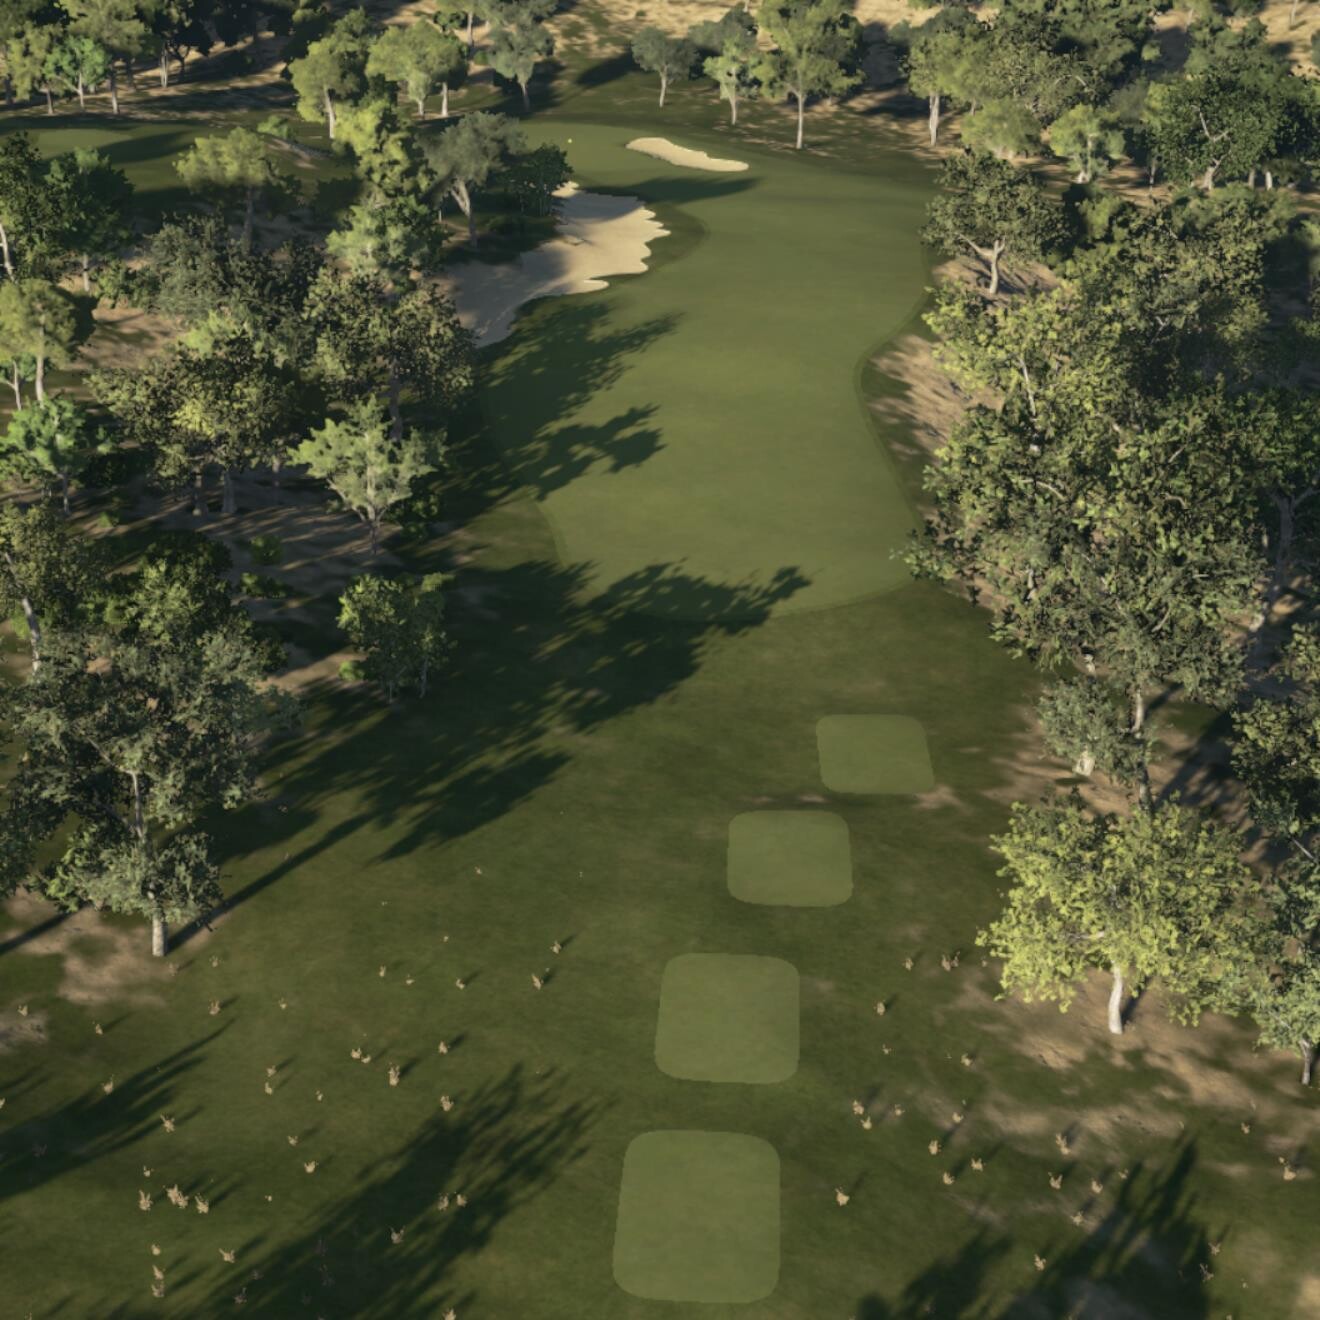
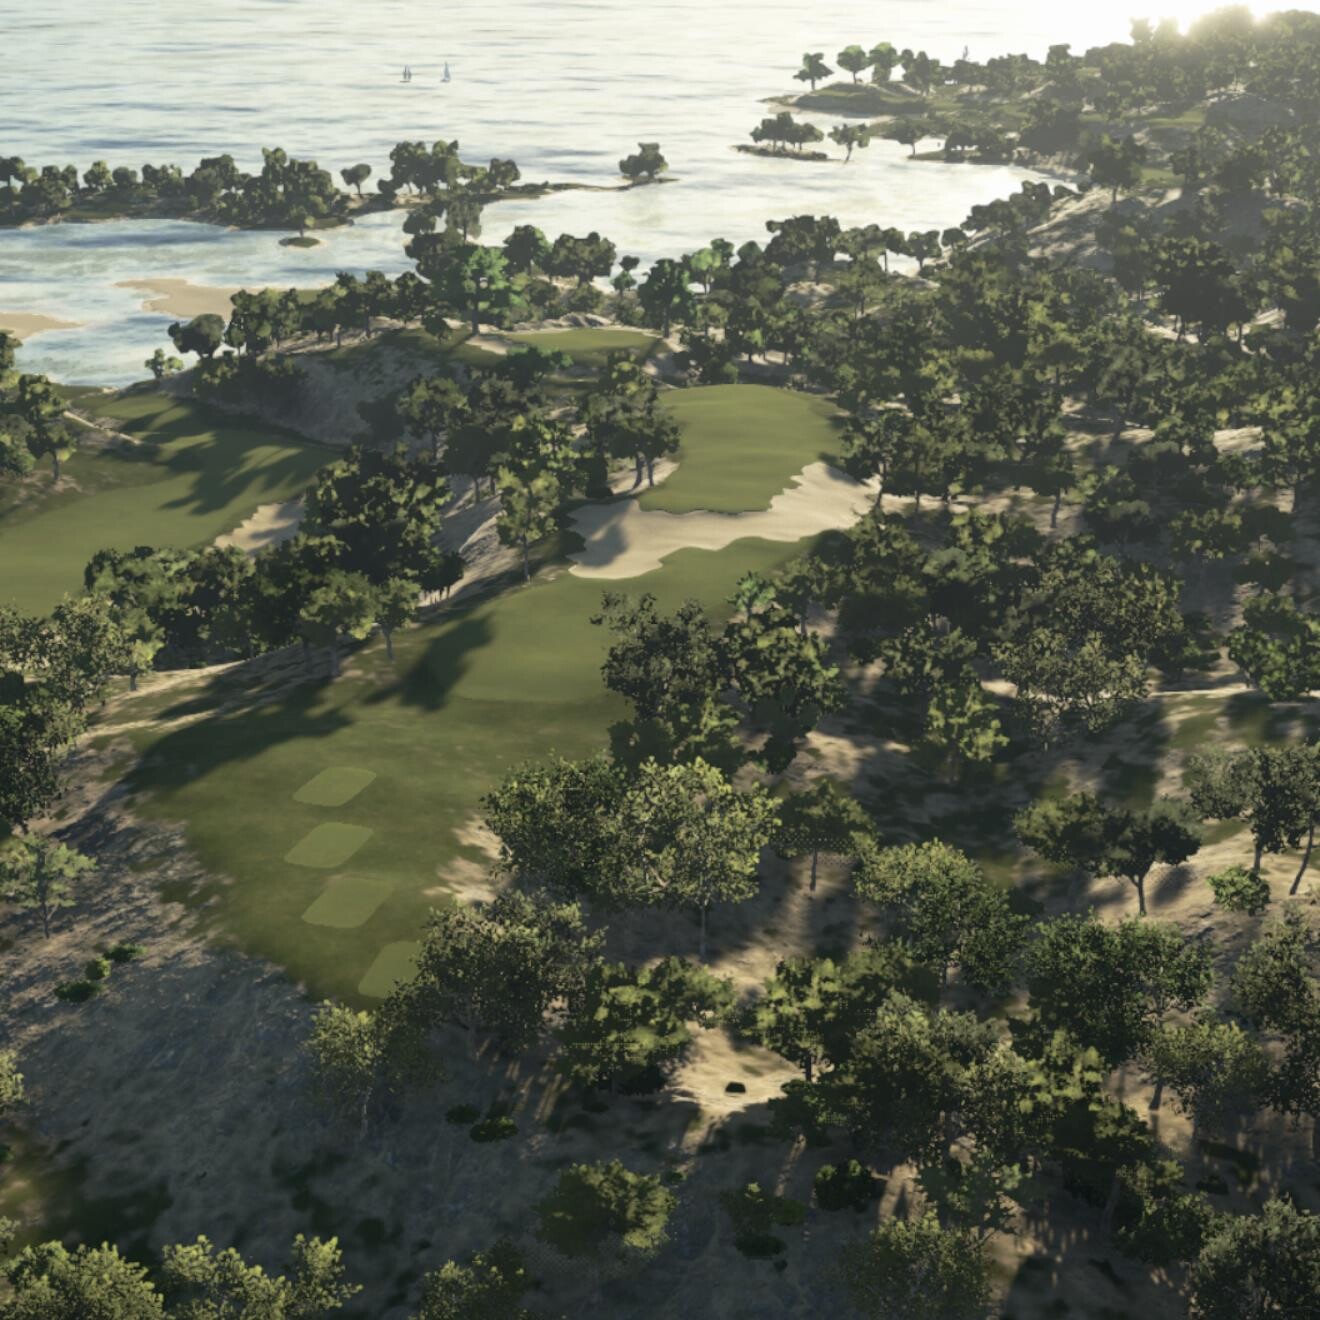
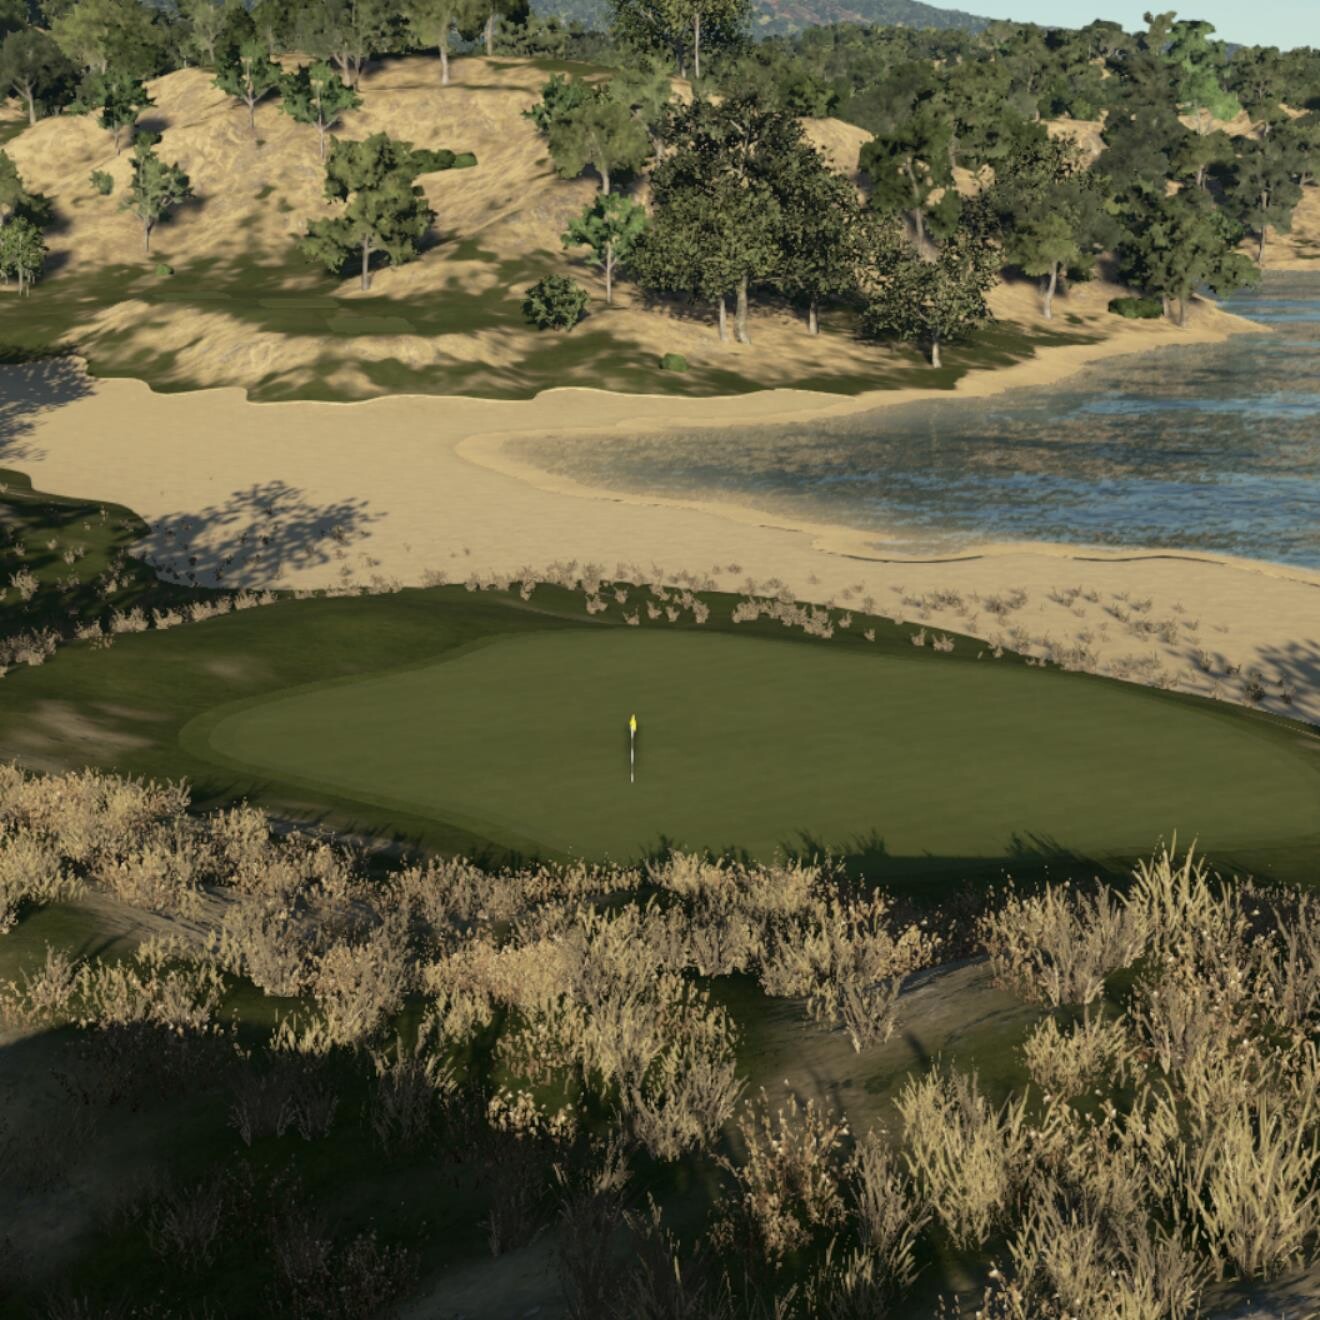
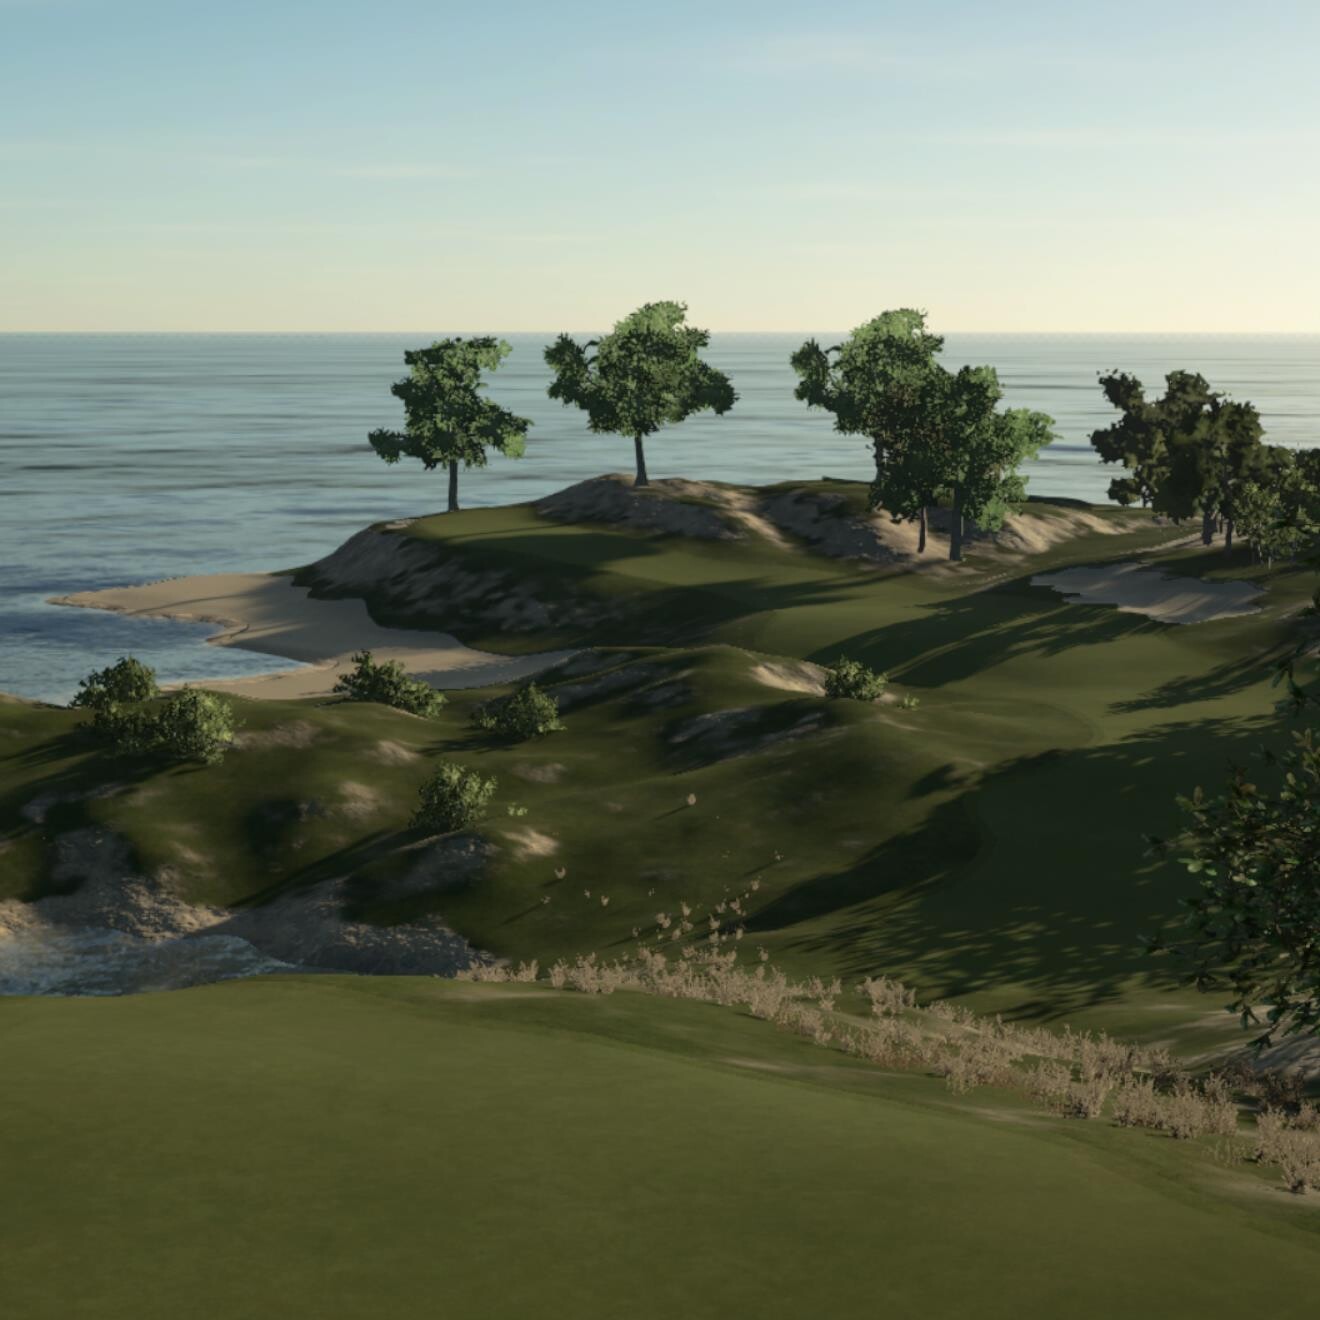
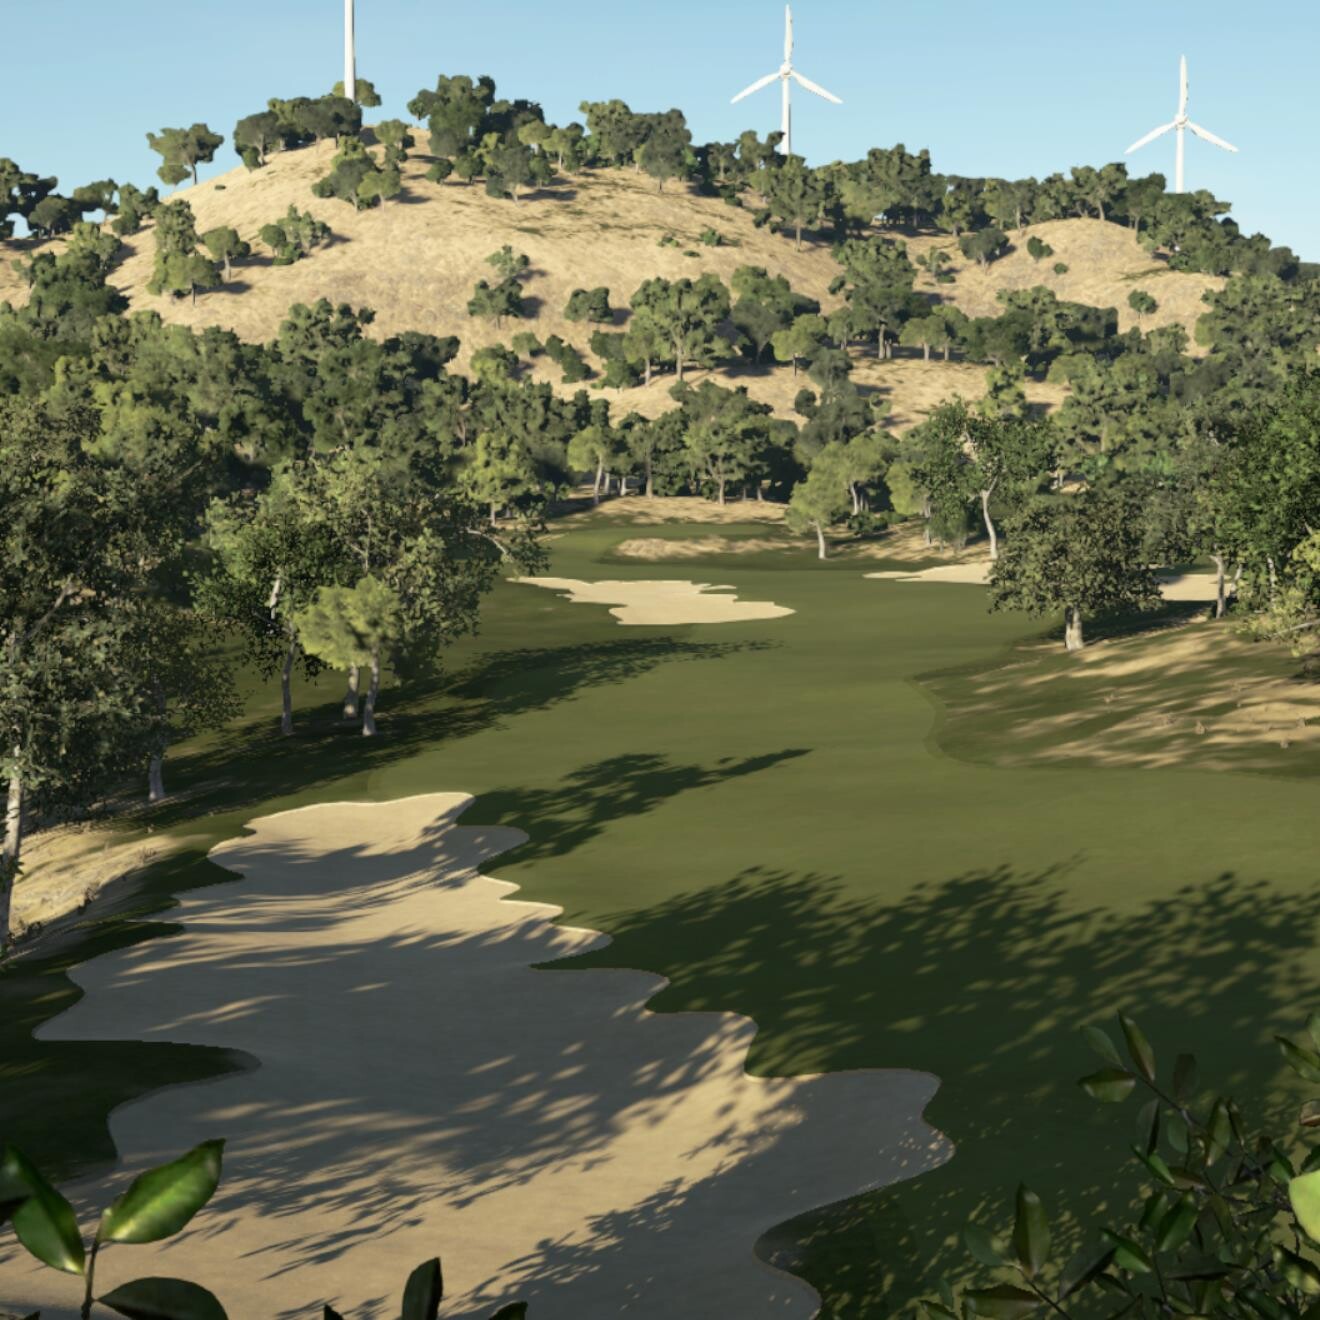
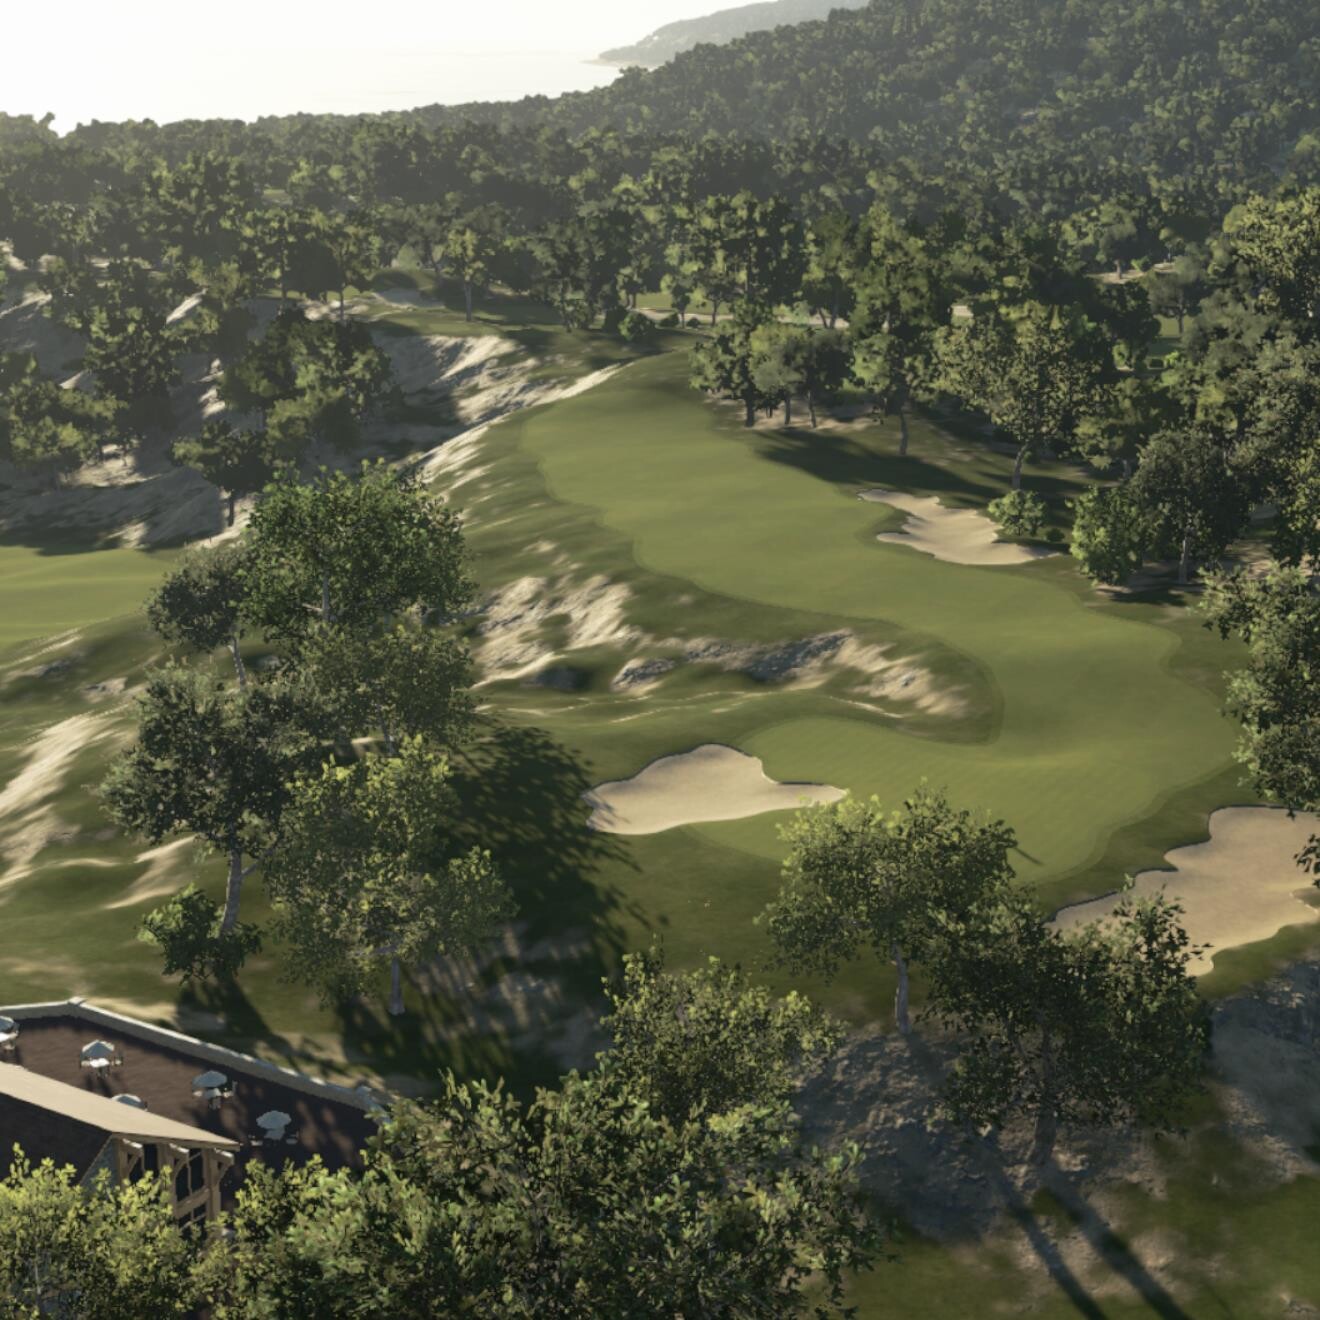
Heron's Perch is a dramatic coastal course set on beaches and cliffs above a protected sound. Significant elevation changes and large bunkers create a challenging course with beautiful views.
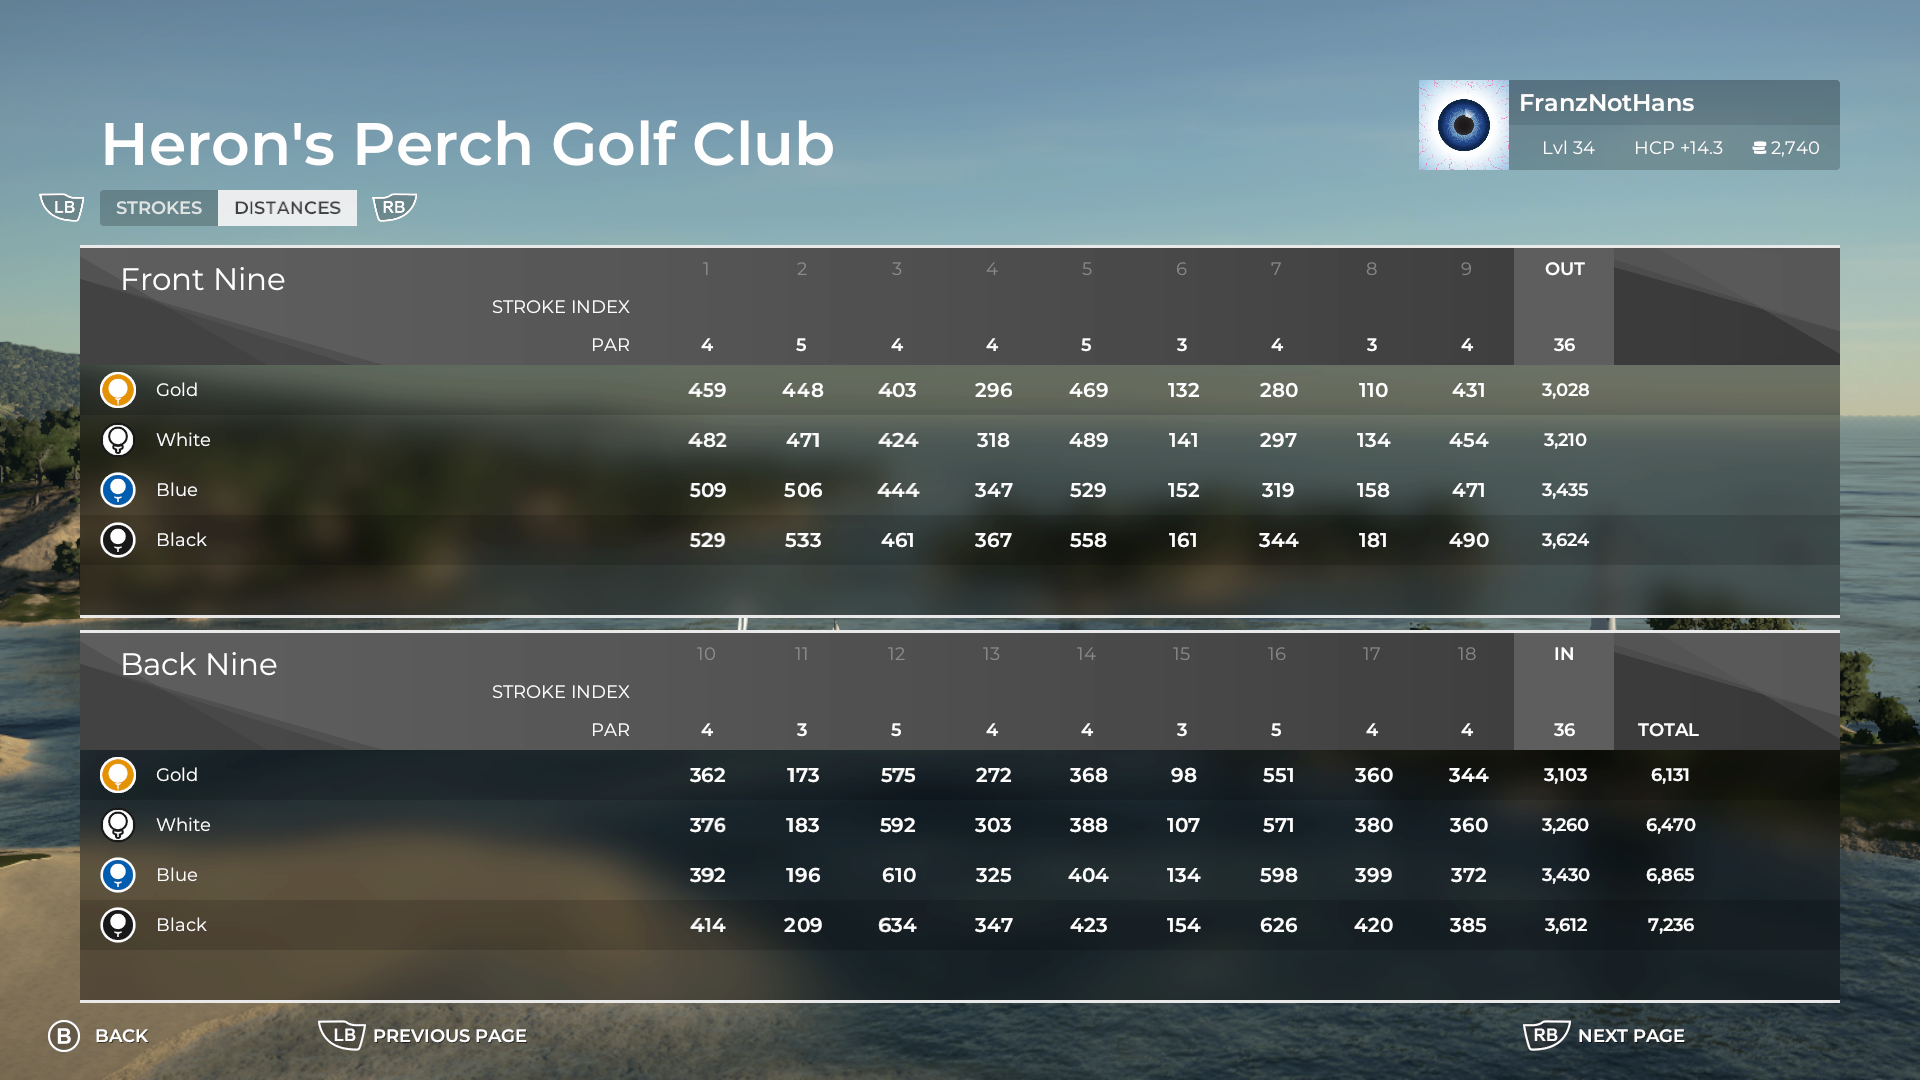
Course Total Yardage:
Gold: 6,131
White: 6,470
Blue: 6,865
Black: 7,236
Hole #1 (Par 4)
Gold: 459
White: 482
Blue: 509
Black: 529
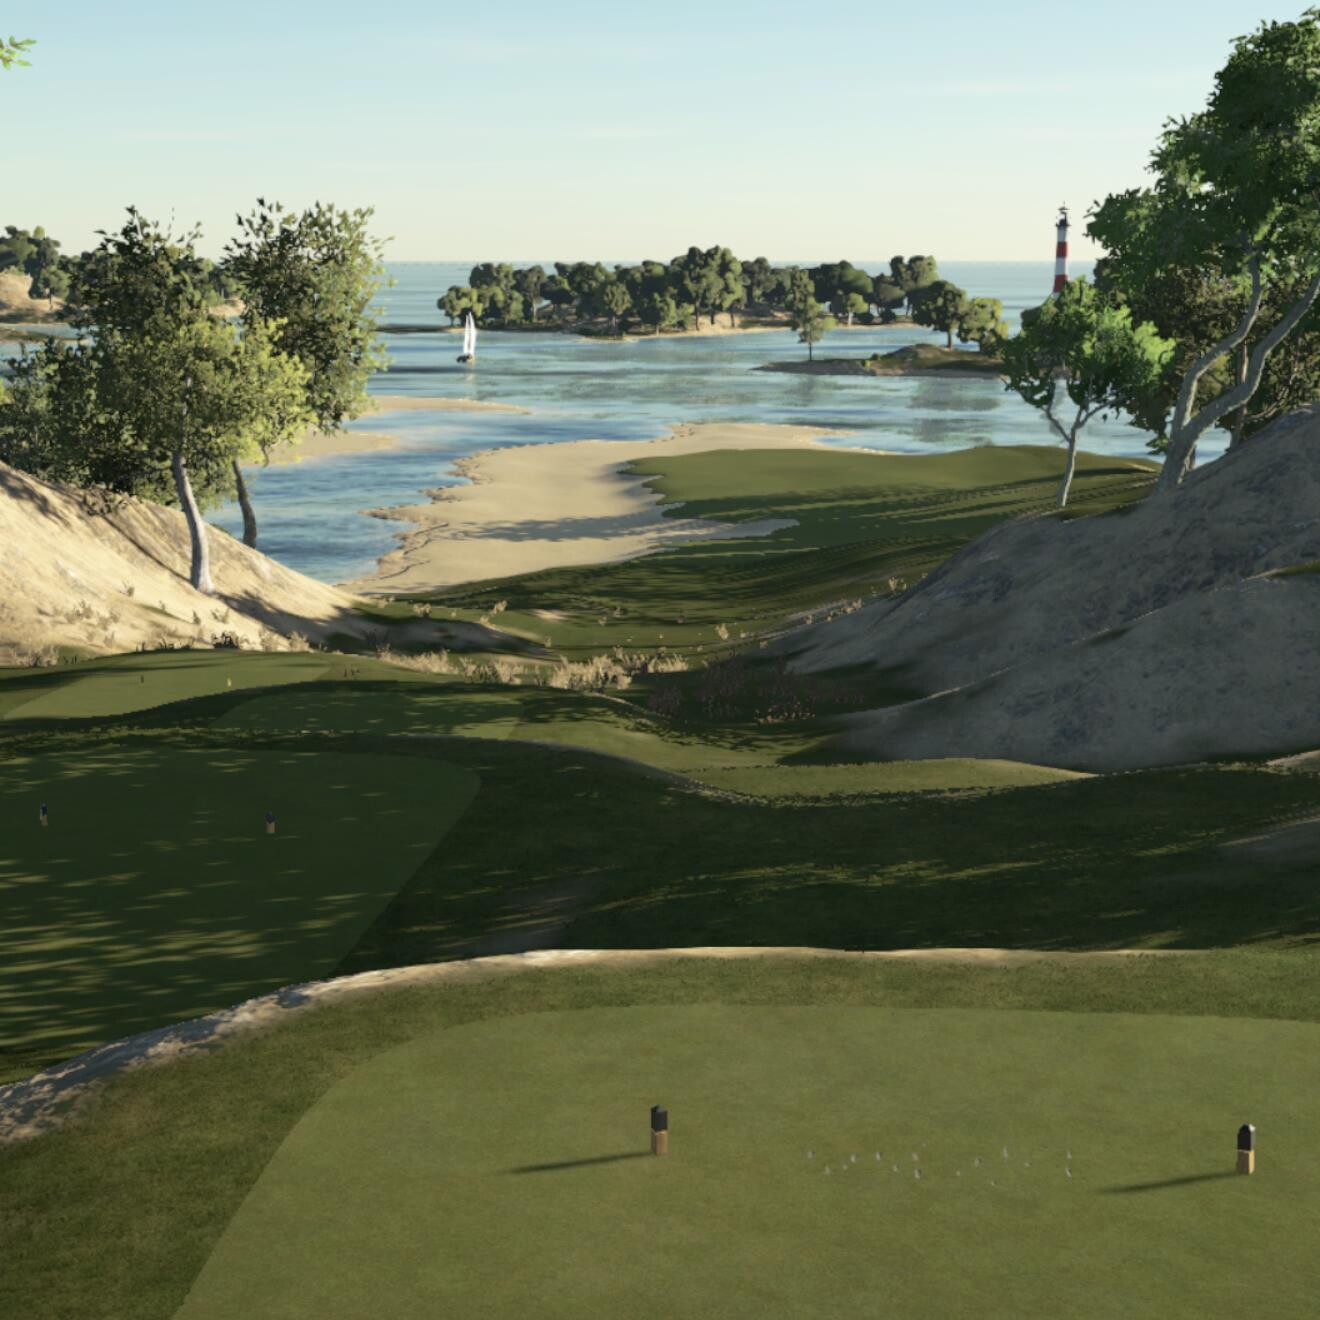
A stunning view from the first tee invites a long drive on the downhill tee shot. Landing in the fairway is critical to reach the green on a long second shot over beaches and water. Par on the first hole is a fantastic start.
Hole #2 (Par 5)
Gold: 448
White: 471
Blue: 506
Black: 533
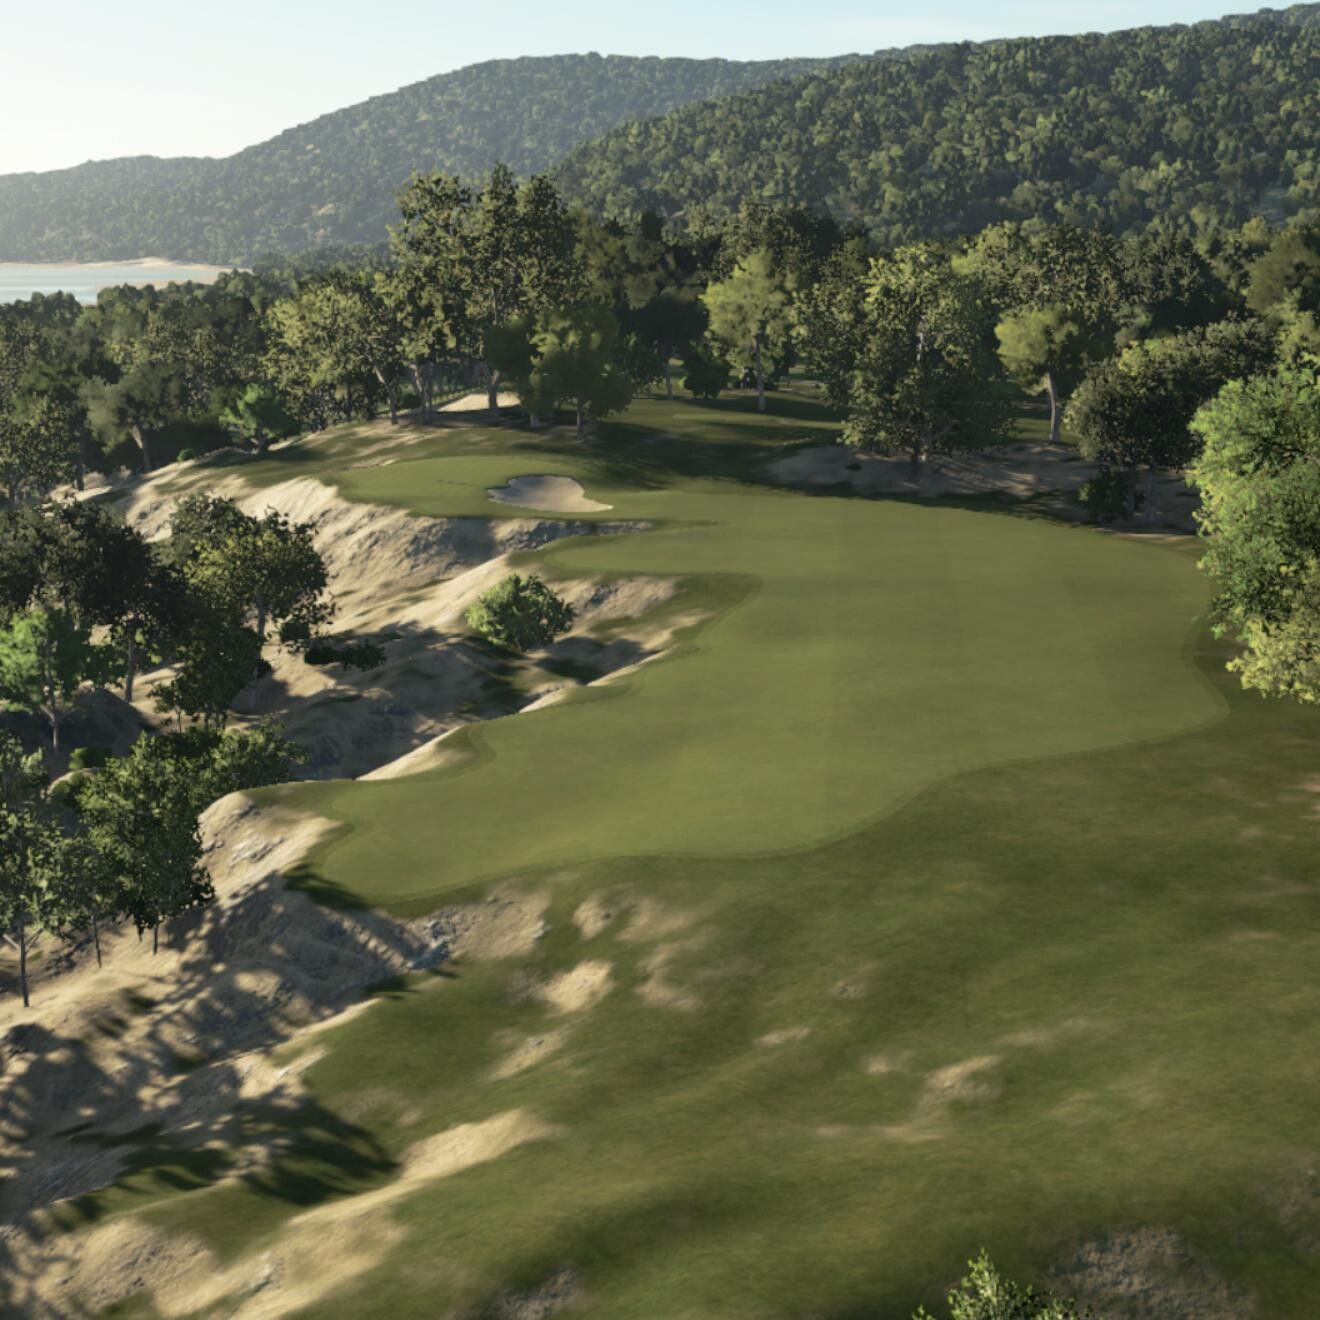
This uphill Par 5 plays longer than the yardage. A solid drive sets up a decision on the second shot toward the elevated green: lay up below the bluff and force a high-lofted third, or play to the elevated fairway for an easy approach or even to reach the front of the green.
Hole #3 (Par 4)
Gold: 403
White: 424
Blue: 444
Black: 461
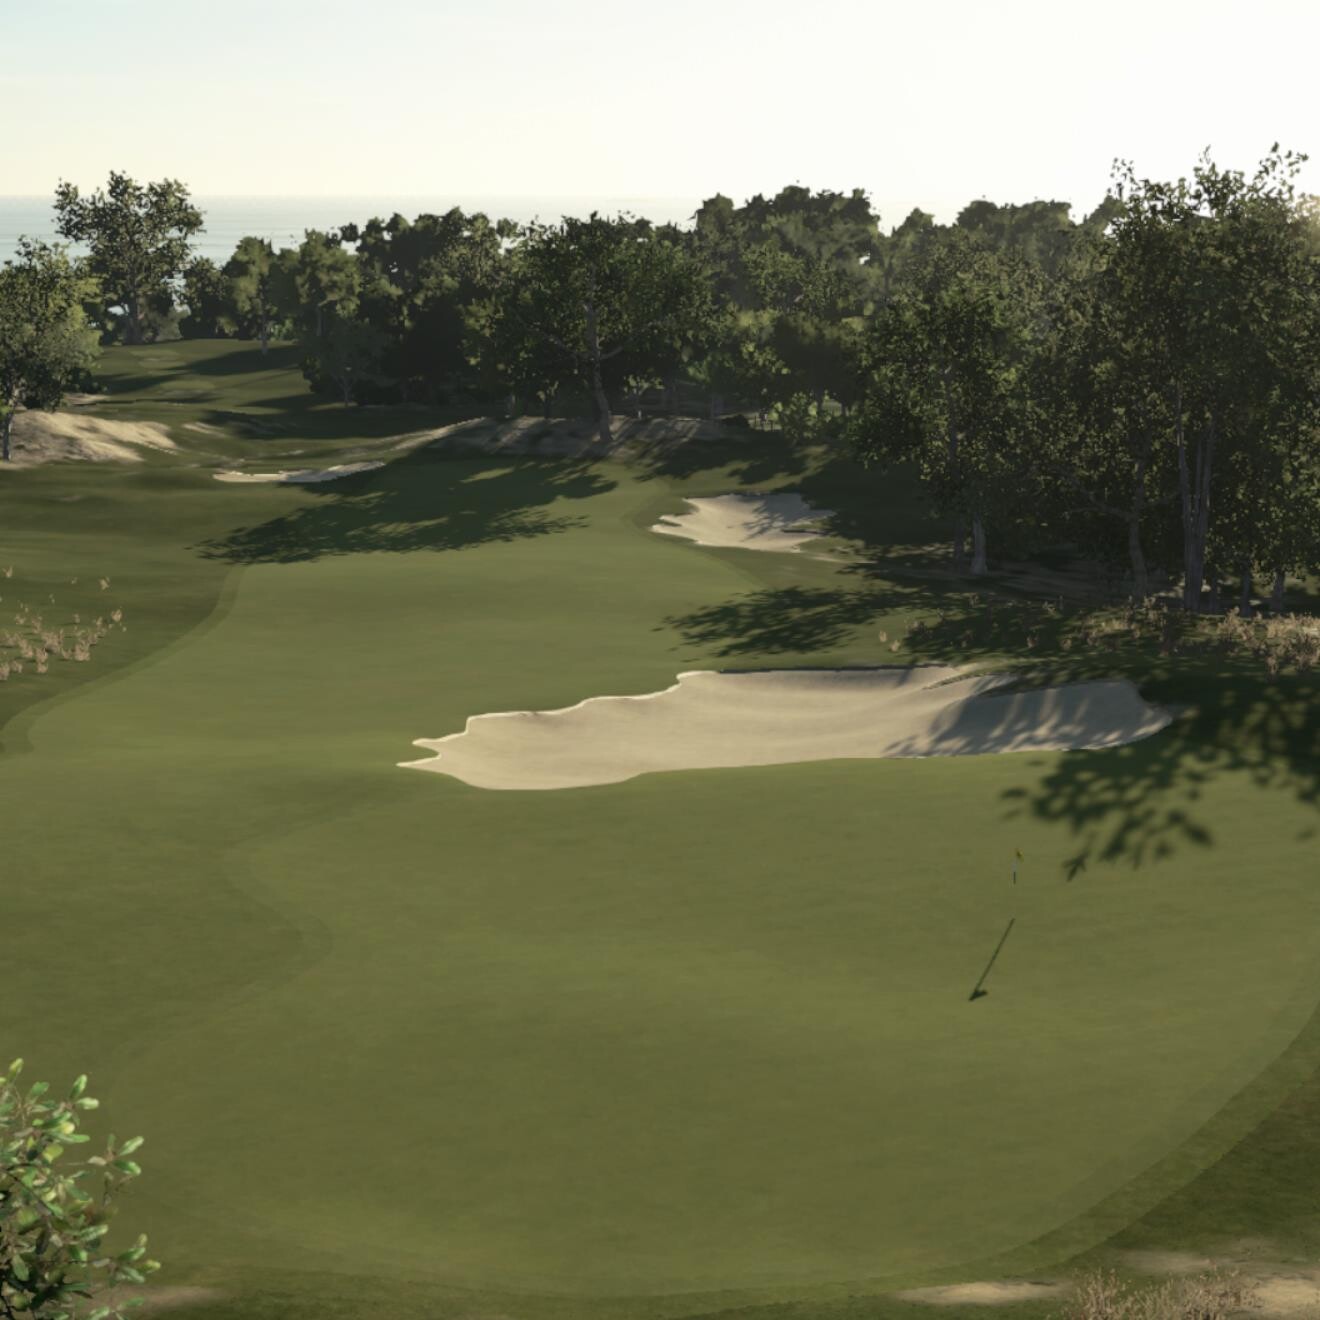
A relatively narrow tee corridor opens to a wide landing area, provided you carry the mid-fairway bunker. The second shot to a clifftop green is one of the most beautiful on the course.
Hole #4 (Par 4)
Gold: 296
White: 318
Blue: 347
Black: 367
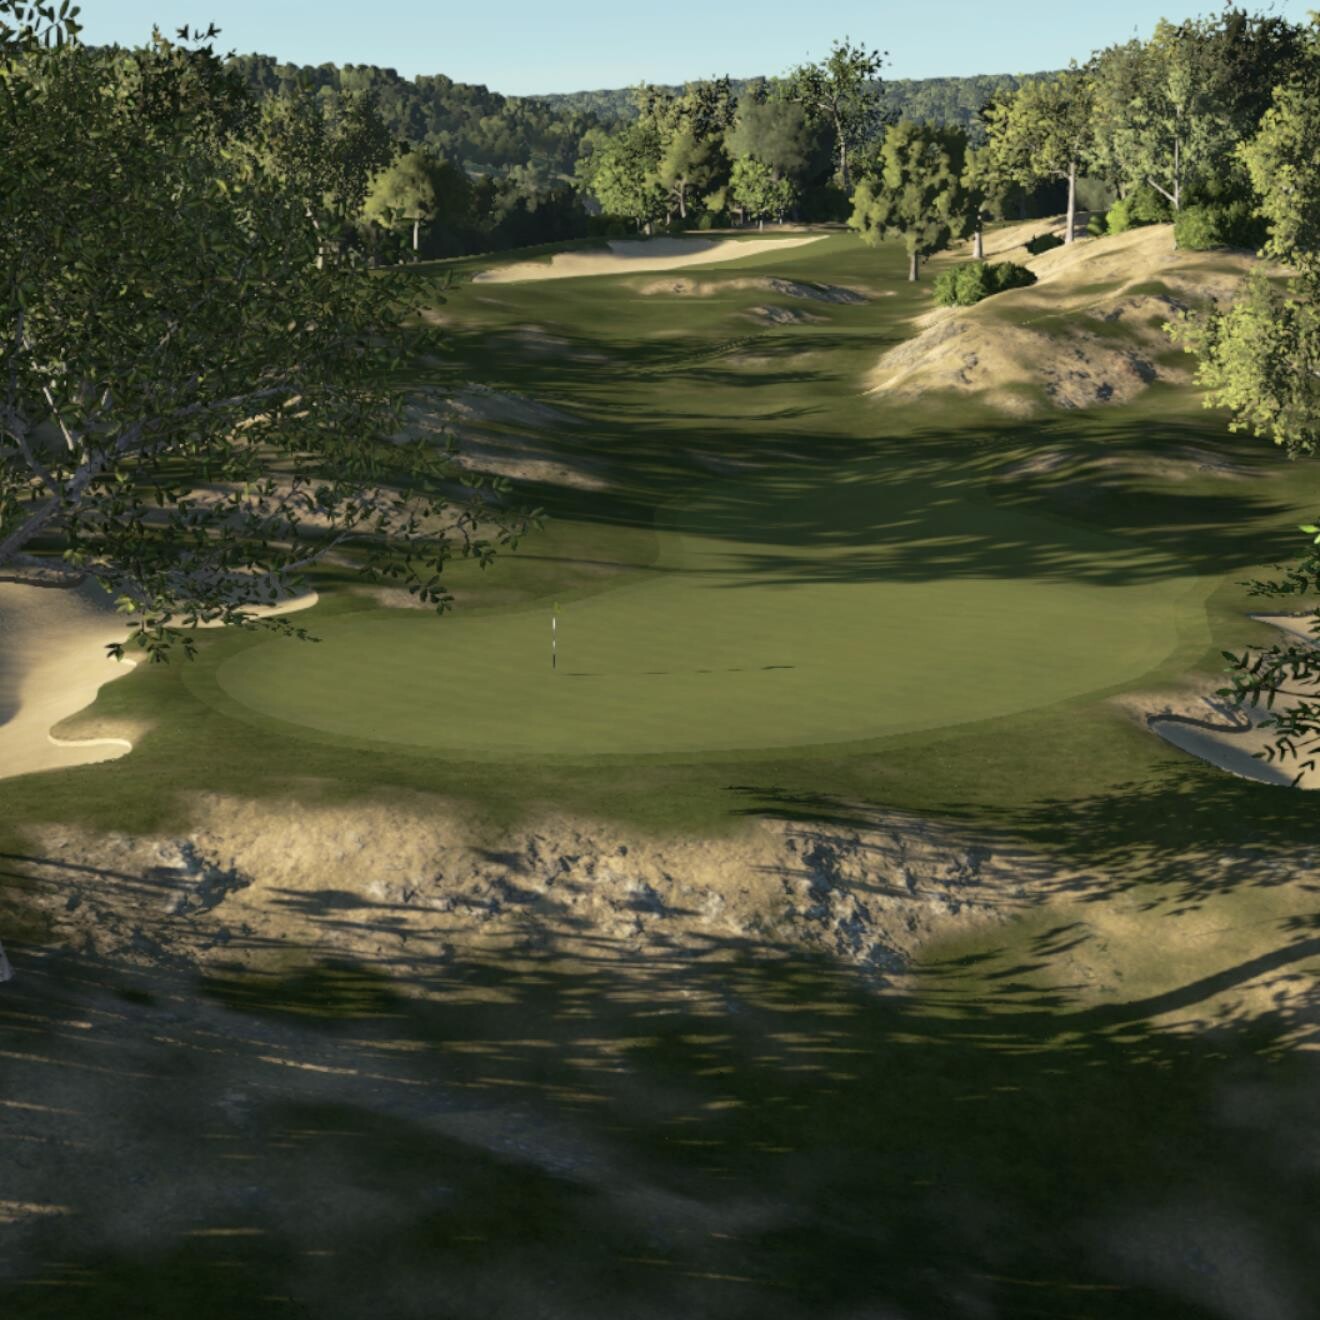
An accurate tee shot is needed from the elevated tee to land safely between the beach and the escarpment to the left. A short approach provides a chance to get close to the pin.
Hole #5 (Par 5)
Gold: 469
White: 489
Blue: 529
Black: 558
The nearly perpendicular fairway gives an opportunity from the tee to play safe to the right or shorten the hole by attacking further left. A side-sloped fairway and out-of-bounds down the left make for a tricky second shot. Favorable wind conditions could make this hole an eagle opportunity, although the green is guarded by a front central bunker that will swallow up weak attempts to reach in two.
Hole #6 (Par 3)
Gold: 132
White: 141
Blue: 152
Black: 161
The first par 3 kicks off a stretch of scoring holes (if you don't count the previous two). This slightly downhill approach from the tee is straightforward, just avoid the front right bunker.
Hole #7 (Par 4)
Gold: 280
White: 297
Blue: 319
Black: 344
In the right conditions, a great tee shot can reach the green on this slight dogleg left hole, but must thread between a long bunker along the left side of the fairway and another at the front right of the green. A large lay-up area straight ahead off the tee provides a simple approach to bag a birdie if the eagle attempt is too risky.
Hole #8 (Par 3)
Gold: 110
White: 134
Blue: 158
Black: 181
The second par 3 in three holes closes out the best birdie chances on the front 9. A large green invites aggressive tee shots.
Hole #9 (Par 4)
Gold: 431
White: 454
Blue: 471
Black: 490
Possibly the toughest hole on the course, this par 4 slams the door on the easy birdie opportunities of recent holes. After clearing the intimidating bunker within view from the tee, a hog’s back makes sticking the fairway a real challenge. A long carry on the second shot to an isolated green leaves few desirable layup options, making par a great score here.
Hole #10 (Par 4)
Gold: 362
White: 376
Blue: 392
Black: 414
The back nine starts with a downhill tee shot through a ravine, followed by a relatively short approach to a slightly elevated green that slopes left toward the beach. This hole can be deceptively forgiving from the tee, as wayward drives may find their way back to the fairway.

Hole #11 (Par 3)
Gold: 173
White: 183
Blue: 196
Black: 209
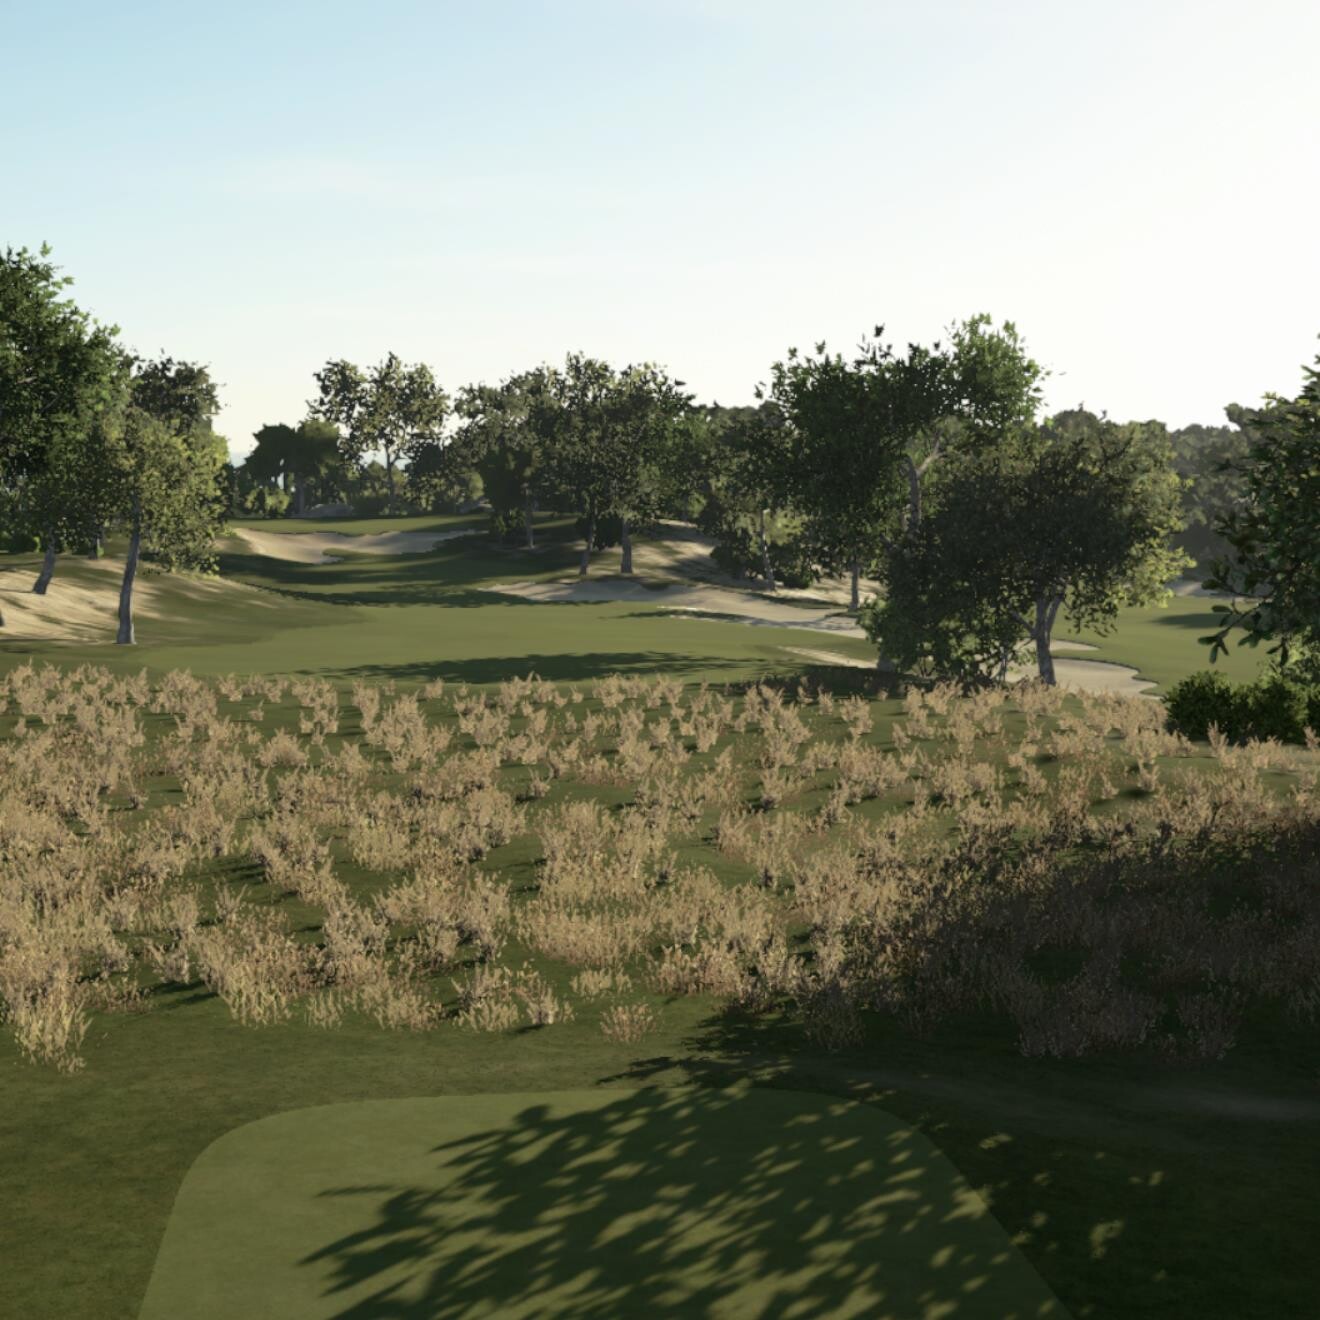
Thick rough awaits any tee shots that don’t find the green after clearing the beach on this long par 3. It’s a large target though, and a conservative shot should have no trouble finding the putting surface.
Hole #12 (Par 5)
Gold: 575
White: 592
Blue: 610
Black: 634
A good tee shot on this devilishly long par 5 will land atop a sea cliff, revealing a picturesque view down the coast to the green that will require two more shots to reach. For the second hole in a row, par is a good score.
Hole #13 (Par 4)
Gold: 272
White: 303
Blue: 325
Black: 347
This short par 4 provides plenty of fairway to avoid the cliffs to the left, but approaches from too far right will likely find themselves at the bottom of a seemingly magnetic bunker protecting the front of the raised green. A firm strike is required to attack this green, but too much could send the ball over the back and out of bounds.
Hole 14 (Par 4)
Gold: 368
White: 388
Blue: 404
Black: 423
This uphill hole could require two extra clubs to reach the green on approach, as anything short will drop into the sand. Landing on the correct tier will make birdie possible.
Hole 15 (Par 3)
Gold: 98
White: 107
Blue: 134
Black: 154
The final par 3 requires careful club selection as it is also the steepest and shortest on the course. The downhill tee shot gives a good look at the green, but any shots landing beyond the back fringe will roll a long way down the hill in the deep rough.
Hole 16 (Par 5)
Gold: 551
White: 571
Blue: 598
Black: 626
While the fairway slopes right to left toward a long bunker, a long tee shot will roll safely past the sand. Two more huge bunkers threaten the landing of the second shot before a difficult approach to an elevated green sloping back to front.
Hole 17 (Par 4)
Gold: 360
White: 380
Blue: 399
Black: 420
This fairway shares a bunker with the 16th, giving a second opportunity to play in the same sand. Avoid it and there’s a chance for birdie with a confident approach over another green-fronting bunker.
Hole 18 (Par 4)
Gold: 344
White: 360
Blue: 372
Black: 385
The finishing hole requires an accurate tee shot as hitting left will find a bunker and anything right will roll down toward the 10th fairway. The large green provides an opportunity for recovery if needed, but a long putt might be necessary to close out the round.
________________
Front 9 Routing:
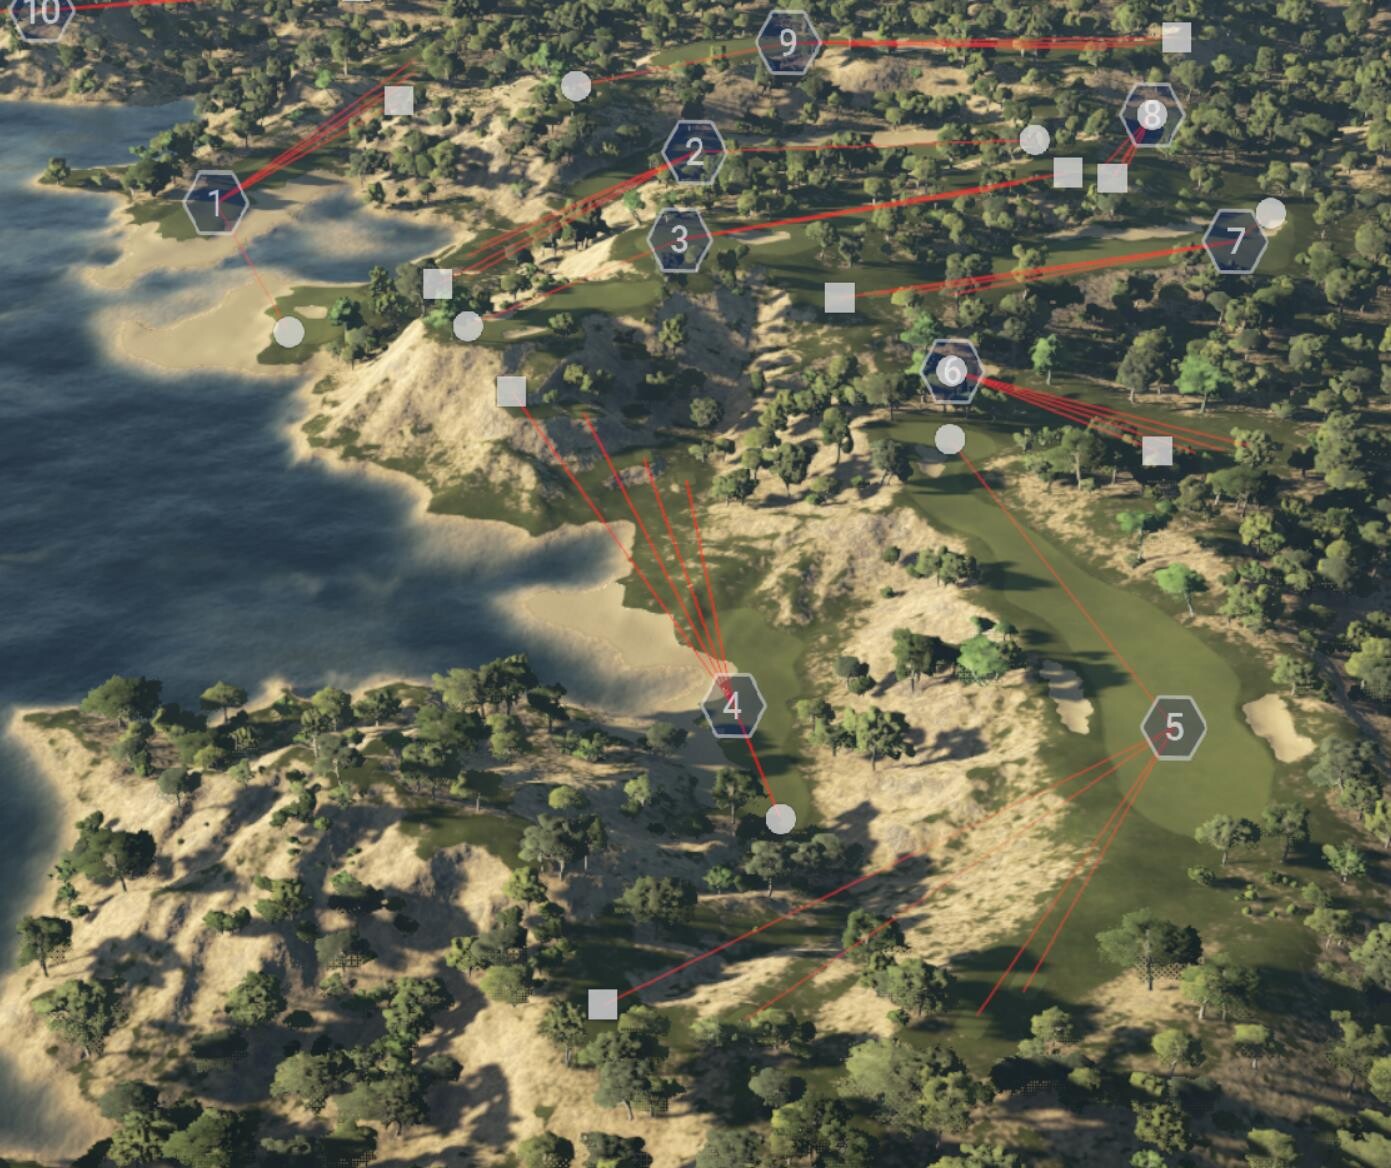
Back 9 Routing:
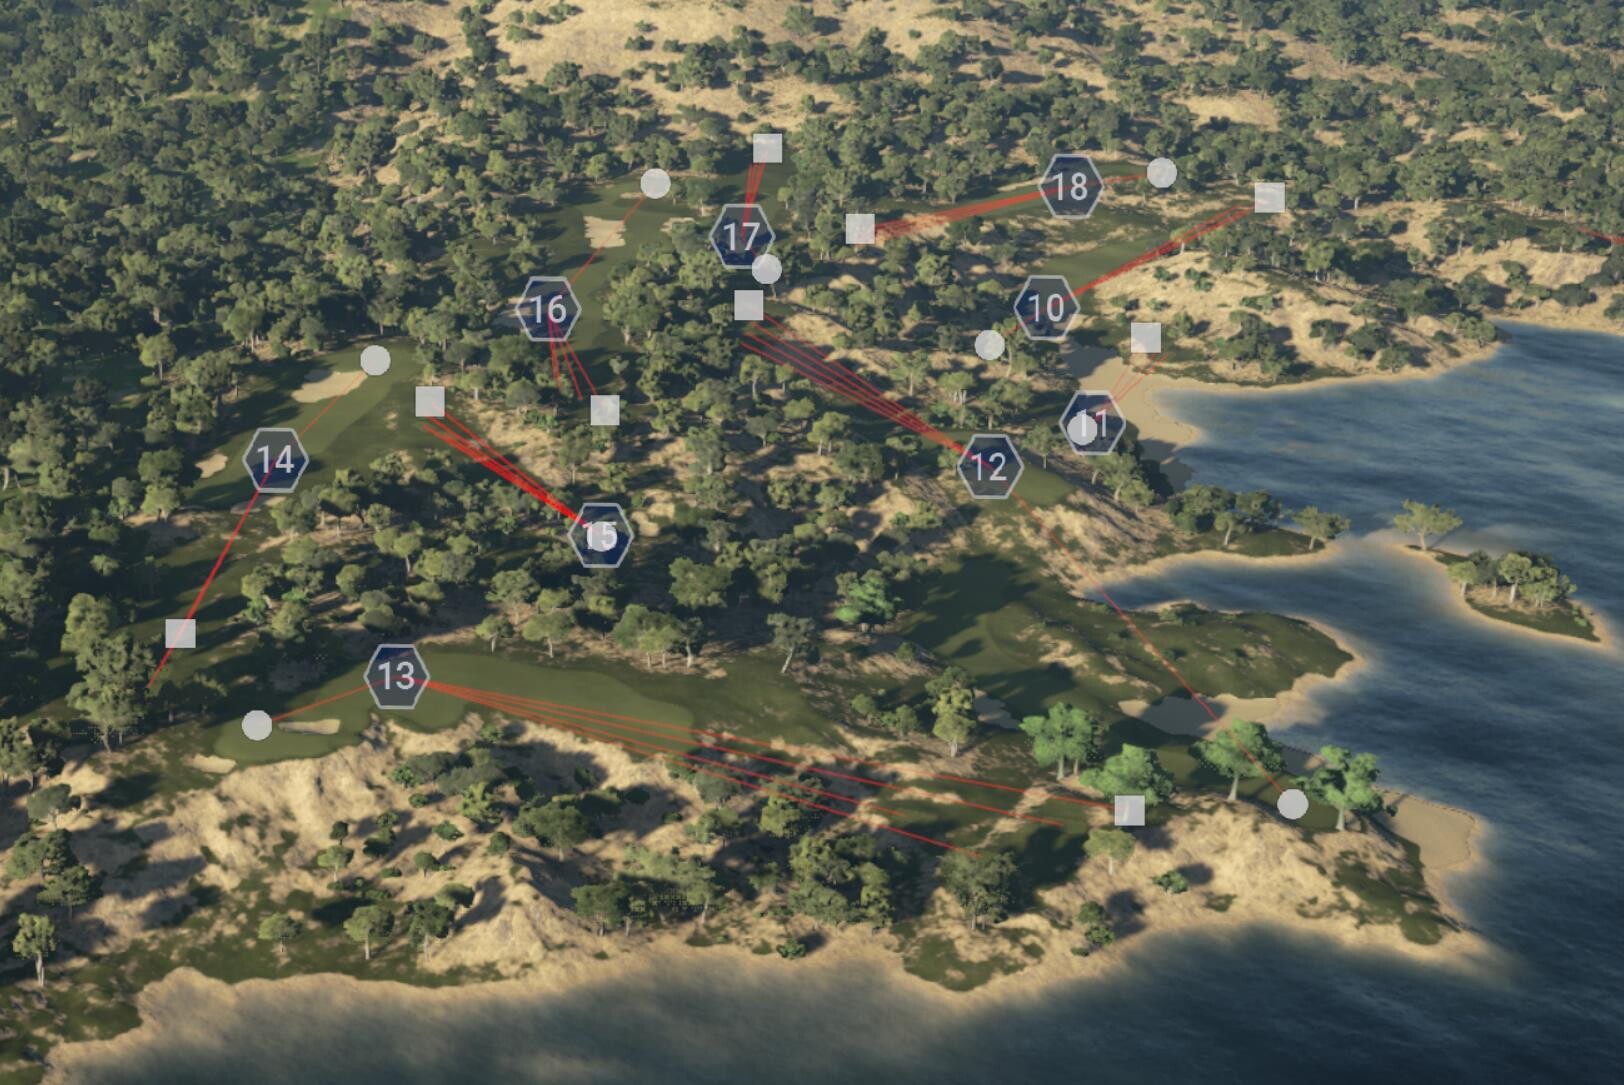
________________
Sorry I don’t have better images of each hole. I’m designing on Xbox so it’s a bit difficult to photograph the course, as I’m sure you’re all aware. Hopefully the images provided give you a good feel for the design and entice you to give it a try.
This isn’t my first course but it’s the first one I’ve been confident enough to publish. I really enjoyed the process and would love to hear any feedback this community can provide.
So please, play a round or two at Heron’s Perch and share your thoughts!
Thanks!
…and special thanks to Crazycanuck1985 for his YouTube videos that helped me so much.
Heron's Perch is a dramatic coastal course set on beaches and cliffs above a protected sound. Significant elevation changes and large bunkers create a challenging course with beautiful views.
Course Total Yardage:
Gold: 6,131
White: 6,470
Blue: 6,865
Black: 7,236
Hole #1 (Par 4)
Gold: 459
White: 482
Blue: 509
Black: 529
A stunning view from the first tee invites a long drive on the downhill tee shot. Landing in the fairway is critical to reach the green on a long second shot over beaches and water. Par on the first hole is a fantastic start.
Hole #2 (Par 5)
Gold: 448
White: 471
Blue: 506
Black: 533
This uphill Par 5 plays longer than the yardage. A solid drive sets up a decision on the second shot toward the elevated green: lay up below the bluff and force a high-lofted third, or play to the elevated fairway for an easy approach or even to reach the front of the green.
Hole #3 (Par 4)
Gold: 403
White: 424
Blue: 444
Black: 461
A relatively narrow tee corridor opens to a wide landing area, provided you carry the mid-fairway bunker. The second shot to a clifftop green is one of the most beautiful on the course.
Hole #4 (Par 4)
Gold: 296
White: 318
Blue: 347
Black: 367
An accurate tee shot is needed from the elevated tee to land safely between the beach and the escarpment to the left. A short approach provides a chance to get close to the pin.
Hole #5 (Par 5)
Gold: 469
White: 489
Blue: 529
Black: 558
The nearly perpendicular fairway gives an opportunity from the tee to play safe to the right or shorten the hole by attacking further left. A side-sloped fairway and out-of-bounds down the left make for a tricky second shot. Favorable wind conditions could make this hole an eagle opportunity, although the green is guarded by a front central bunker that will swallow up weak attempts to reach in two.
Hole #6 (Par 3)
Gold: 132
White: 141
Blue: 152
Black: 161
The first par 3 kicks off a stretch of scoring holes (if you don't count the previous two). This slightly downhill approach from the tee is straightforward, just avoid the front right bunker.
Hole #7 (Par 4)
Gold: 280
White: 297
Blue: 319
Black: 344
In the right conditions, a great tee shot can reach the green on this slight dogleg left hole, but must thread between a long bunker along the left side of the fairway and another at the front right of the green. A large lay-up area straight ahead off the tee provides a simple approach to bag a birdie if the eagle attempt is too risky.
Hole #8 (Par 3)
Gold: 110
White: 134
Blue: 158
Black: 181
The second par 3 in three holes closes out the best birdie chances on the front 9. A large green invites aggressive tee shots.
Hole #9 (Par 4)
Gold: 431
White: 454
Blue: 471
Black: 490
Possibly the toughest hole on the course, this par 4 slams the door on the easy birdie opportunities of recent holes. After clearing the intimidating bunker within view from the tee, a hog’s back makes sticking the fairway a real challenge. A long carry on the second shot to an isolated green leaves few desirable layup options, making par a great score here.
Hole #10 (Par 4)
Gold: 362
White: 376
Blue: 392
Black: 414
The back nine starts with a downhill tee shot through a ravine, followed by a relatively short approach to a slightly elevated green that slopes left toward the beach. This hole can be deceptively forgiving from the tee, as wayward drives may find their way back to the fairway.
Hole #11 (Par 3)
Gold: 173
White: 183
Blue: 196
Black: 209
Thick rough awaits any tee shots that don’t find the green after clearing the beach on this long par 3. It’s a large target though, and a conservative shot should have no trouble finding the putting surface.
Hole #12 (Par 5)
Gold: 575
White: 592
Blue: 610
Black: 634
A good tee shot on this devilishly long par 5 will land atop a sea cliff, revealing a picturesque view down the coast to the green that will require two more shots to reach. For the second hole in a row, par is a good score.
Hole #13 (Par 4)
Gold: 272
White: 303
Blue: 325
Black: 347
This short par 4 provides plenty of fairway to avoid the cliffs to the left, but approaches from too far right will likely find themselves at the bottom of a seemingly magnetic bunker protecting the front of the raised green. A firm strike is required to attack this green, but too much could send the ball over the back and out of bounds.
Hole 14 (Par 4)
Gold: 368
White: 388
Blue: 404
Black: 423
This uphill hole could require two extra clubs to reach the green on approach, as anything short will drop into the sand. Landing on the correct tier will make birdie possible.
Hole 15 (Par 3)
Gold: 98
White: 107
Blue: 134
Black: 154
The final par 3 requires careful club selection as it is also the steepest and shortest on the course. The downhill tee shot gives a good look at the green, but any shots landing beyond the back fringe will roll a long way down the hill in the deep rough.
Hole 16 (Par 5)
Gold: 551
White: 571
Blue: 598
Black: 626
While the fairway slopes right to left toward a long bunker, a long tee shot will roll safely past the sand. Two more huge bunkers threaten the landing of the second shot before a difficult approach to an elevated green sloping back to front.
Hole 17 (Par 4)
Gold: 360
White: 380
Blue: 399
Black: 420
This fairway shares a bunker with the 16th, giving a second opportunity to play in the same sand. Avoid it and there’s a chance for birdie with a confident approach over another green-fronting bunker.
Hole 18 (Par 4)
Gold: 344
White: 360
Blue: 372
Black: 385
The finishing hole requires an accurate tee shot as hitting left will find a bunker and anything right will roll down toward the 10th fairway. The large green provides an opportunity for recovery if needed, but a long putt might be necessary to close out the round.
________________
Front 9 Routing:
Back 9 Routing:
________________
Sorry I don’t have better images of each hole. I’m designing on Xbox so it’s a bit difficult to photograph the course, as I’m sure you’re all aware. Hopefully the images provided give you a good feel for the design and entice you to give it a try.
This isn’t my first course but it’s the first one I’ve been confident enough to publish. I really enjoyed the process and would love to hear any feedback this community can provide.
So please, play a round or two at Heron’s Perch and share your thoughts!
Thanks!
…and special thanks to Crazycanuck1985 for his YouTube videos that helped me so much.


