Infinity Mountain - LoopA7219 (Black Tees) - 6943 (Red Tees)
Most Helpful Wind: Southeast
Most Hurtful Wind: West
Loop A is my entry into the competition. There were three requirements:
- A Drivable Par 4 I have two (Holes 9 and 17), three with Hole 19
- One green must have a retaining wall around it (Hole 8)
- Three greens must be within 150 yards of each other (Holes 2, 5 and 13)
1. Par 5 - 575/560

You start your round on this mid range Par 5 with the fairway dissected into three sections from a stream and waste area. The area that’s driver length does push you away from the green, but still usually it is worth it if you can properly fade your second shot onto the green. The green being sandwiched by bunkers, landing the approach still is not an easy feat. Heavy head winds turn this hole into a for sure three shot but if navigated correctly with the ample layup space provided there’s still an opportunity to score below regulation.
2. Par 3 - 180/165

A mid length Par 3 to a pinched perpendicular Marian-esque green demands proper distance control, wind detection and backspin all in one shot.
3. Par 4 - 469/454

On this mid length Par 4 you are tasked with the question do you hit a 5 Wood to the safe landing zone and straight shot on the reverse Redan skinny green or hit driver for a short iron or wedge that needs to land and hold between the two bunkers enclosing this green?
4. Par 3 - 204/189

A Volcano style long Par 3 with a green contour that really can test how skilled your ground game is. Just be careful of the multiple run off spots when trying to roll onto this putting surface.
5. Par 4 - 392/377

This short Par 4 has a plethora of interesting options. There’s a separated road on the side that can offer a straight shot to the green but require either clubbing down from the driver or a Herculean drive over the stream. While on the right side is a comfortable drive carrying the stream or wide open lay up in front of it but requires an approach shot over a row of centerline bunkers to a sort of “double biarritz” L-shaped green.
6. Par 4 - 491/476

A long Par 4 with the age old question of now or later. Take on the danger now and attempt to hit the far right driving area that requires carrying the waste area and squeezing in next to the pesky fairway bunker or hit to the center of the fairway and deal with carrying the green side bunkers on the longer approach. Take note of the pin positions as well when making your decision.
7. Par 5 - 633/618

On this long Par 5 you are posed to drive to a fairway with a center spine that then dictates how your approach will be. If you hit to the left and flirt with the water you potentially can hit or roll on the greens unless the wind is a hindrance. On the right side or with a head wind you then have to decide how much you want to dance with the large bunker 50 yards proud of the green on your approach or layup in front of it.
8. Par 3 -120/108

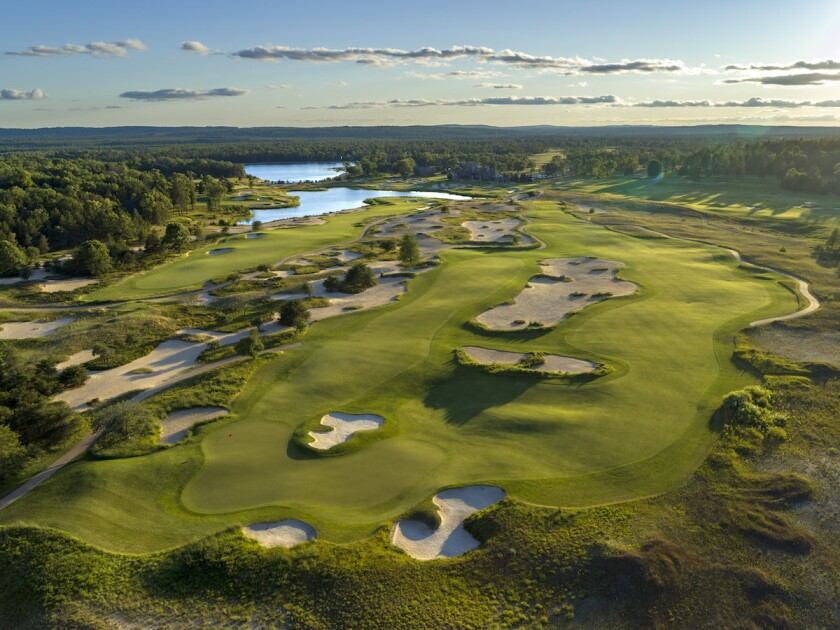
The shortest hole on the course is this unique Par 3 where you are hitting to the triangular thumb printed raised green surrounded by Waste areas. This is the most this course ever gets to target golf, where accuracy is the most important currency.
9. Par 4 - 290/274

To end the front 9 is an enticing but dangerous drivable Par 4. With water surrounding the left and back side and a greedy trap in front, you have a tight window to land your drive and must stop it before the ball rolls to it’s wet demise. Perched above you is the deck of the club house so I hope you don’t mind an audience.
Grab some food or enjoy a beer at the halfway house positioned overlooking the 9th fairway.
10. Par 3 - 237/222

A long slightly Redan Par 3 that calls for either some opportunistic ground game or shot shaping. Either can work with a green built with channels to utilize but also hurting slopes to avoid.
11. Par 5 - 631/600

From the tee there is quite a decision on this long Par 5. First is avoid the cliffs for a very difficult two shot approach to this sloping heavily protected green or take on the cliff side and middle waste bunker area on the drive for either a better opportunity to make the green in two or to open up the plateau layup spot to the left which has the best approach to the green.
12. Par 4 - 409/394

If you can’t make the tee shot over the water most will need to pull out a wood. Left gives a closer but blind shot (aim for the dead tree behind the green) right brings the green more in focus but a longer club to get there.
13. Par 5 - 613/598

This long Par 5 can be reachable even in a head wind but that second shot takes a good amount of precision carrying the bunkers front left while staying on top of the swale in front of the green. You can always aim your second shot more left and hit the flatten part of the fairway (where tees are for Loop B) and make this a three shoter.
14. Par 4 - 469/454

Only in a face wind or with a lower driver is that menacing fairway bunker in play but the second shot you want to be as close as possible for a club with enough loft to hold this raised table top green that slips away from you. The safe play is to aim for the dead tree and distance it to be the front center of the green (enough to carry that front bunker), but who wants to play it safe?!
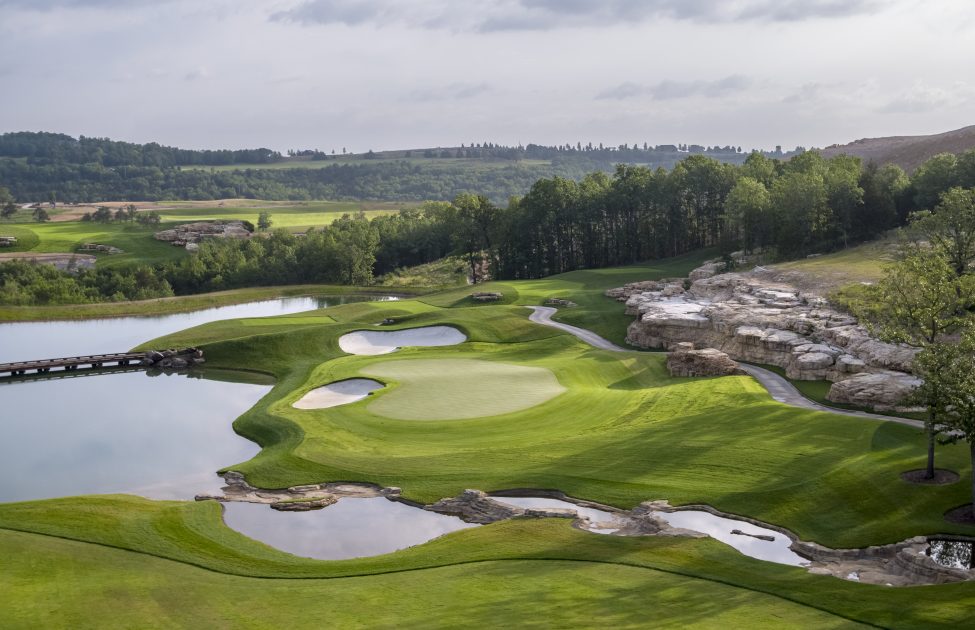
15. Par 5 - 520/506

These next three holes are the generous scoring run that it is wise to go under par on before the difficult final hole. This shortest Par 5 is of course the best to try and Eagle but don’t let the short distance fool you, this guy can still have some teeth. While trying to hit this green in 2, pins on the right bring in the annoyingly placed sand traps while pins on the left bring in the water from the stunning rock formation waterfall.
16. Par 3 - 151/144

While on the 16th tee take a moment to admire the aforementioned rock formation with the water crashing down it. A real beauty tucked away in the back corner of this course as a gift to the golfers. Now look up at this infinity green that generally is pretty favorable to attack when distance is calculated correctly.
17. Par 4 - 328/313

How greedy are you? That’s the question on 18 with this cape/reverse Redan drivable Par 4 that regardless if you go for the green or pull out a wood you should aim to score under regulation on. 3 Wood isn’t a walk in the park with the waste area pinching the landing zone, but going for the green involves dealing with the water cutting in front of the green. This hole was influenced by one of my favorite holes in the drivable Par 4 Hole 10 at Riviera.
18. Par 4 - 507/491

We end our run on a tricky long Par 4. There’s a portion of the fairway visible in front of you that leaves a downhill but still long approach into the tight green with some sandy protection in front. Or aim right to a blind tee shot to the lower fairway section but a better approach. How bold do you wish to be?


 Good to see you bringing it! Adding this and Allan's course for tomorrow morning's list


