|
|
Slopes
Jul 27, 2019 22:45:28 GMT -5
via mobile
Post by noahmoelter23 on Jul 27, 2019 22:45:28 GMT -5
I have trouble making steady uphill and downhill holes, they always have ridges in the fairway and around the hole is always a cliff or mountain, how do I make steady inclines and declines. Thanks!
|
|
|
|
Slopes
Jul 28, 2019 2:20:35 GMT -5
Post by b101 on Jul 28, 2019 2:20:35 GMT -5
Hi, For future reference, this is a topic for the Tips and Tricks section (I'll ask a mod to move it). I will give you an answer to your specific question shortly, but I think a bit of explanation of WHY this happens will actually help you more. The key is in understanding the difference between fuzzy and hard (white). Anything fuzzy will raise or flatten gradually, whereas anything in white (hard) will go all the way. Hard to explain, but if you look at the screenshots below of what different brushes do on flatten at the same height and compare what they are making the land do to what the brush shape is, it should start making sense: Hardest (great for tee boxes where you want them totally flat, or for flattening greens before you sculpt them properly if you want to put in all the breaks yourself): 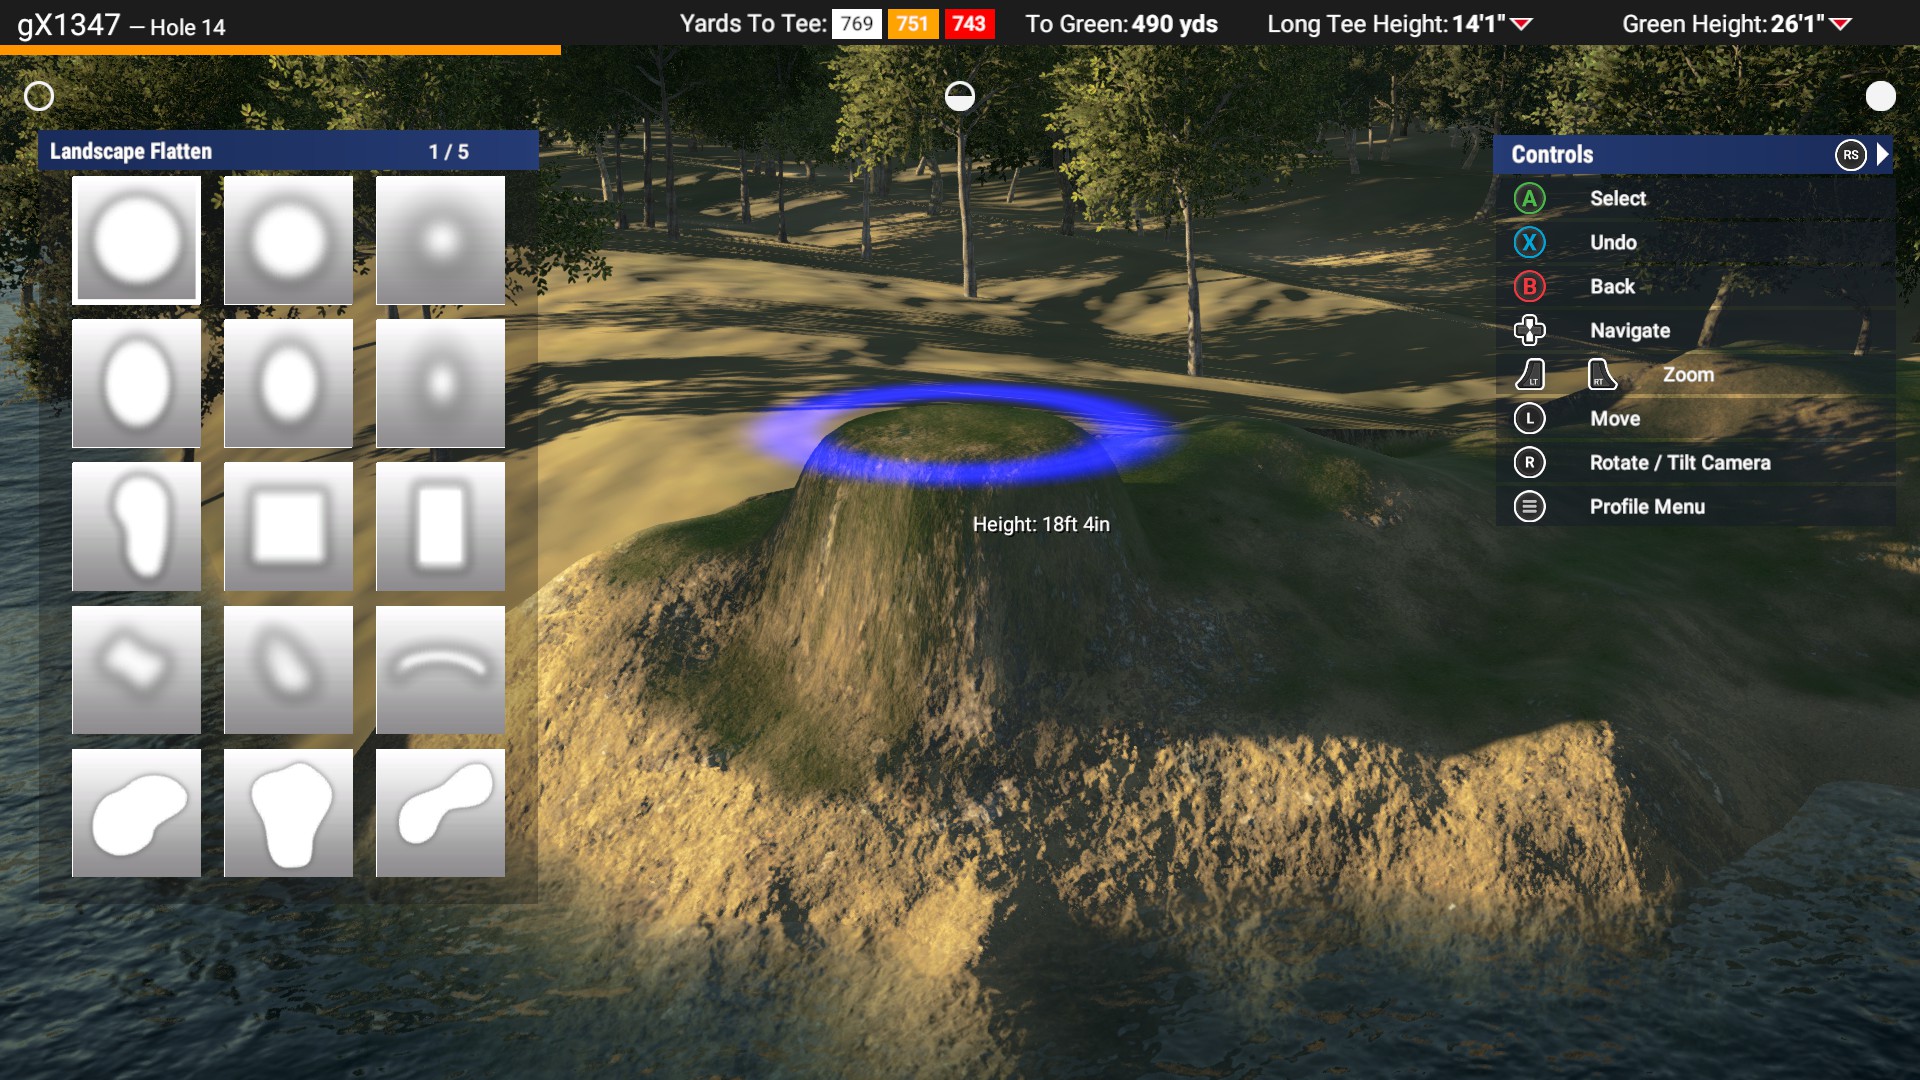 Second hardest (great for raising greens as it gives a more gentle run off from the sides): 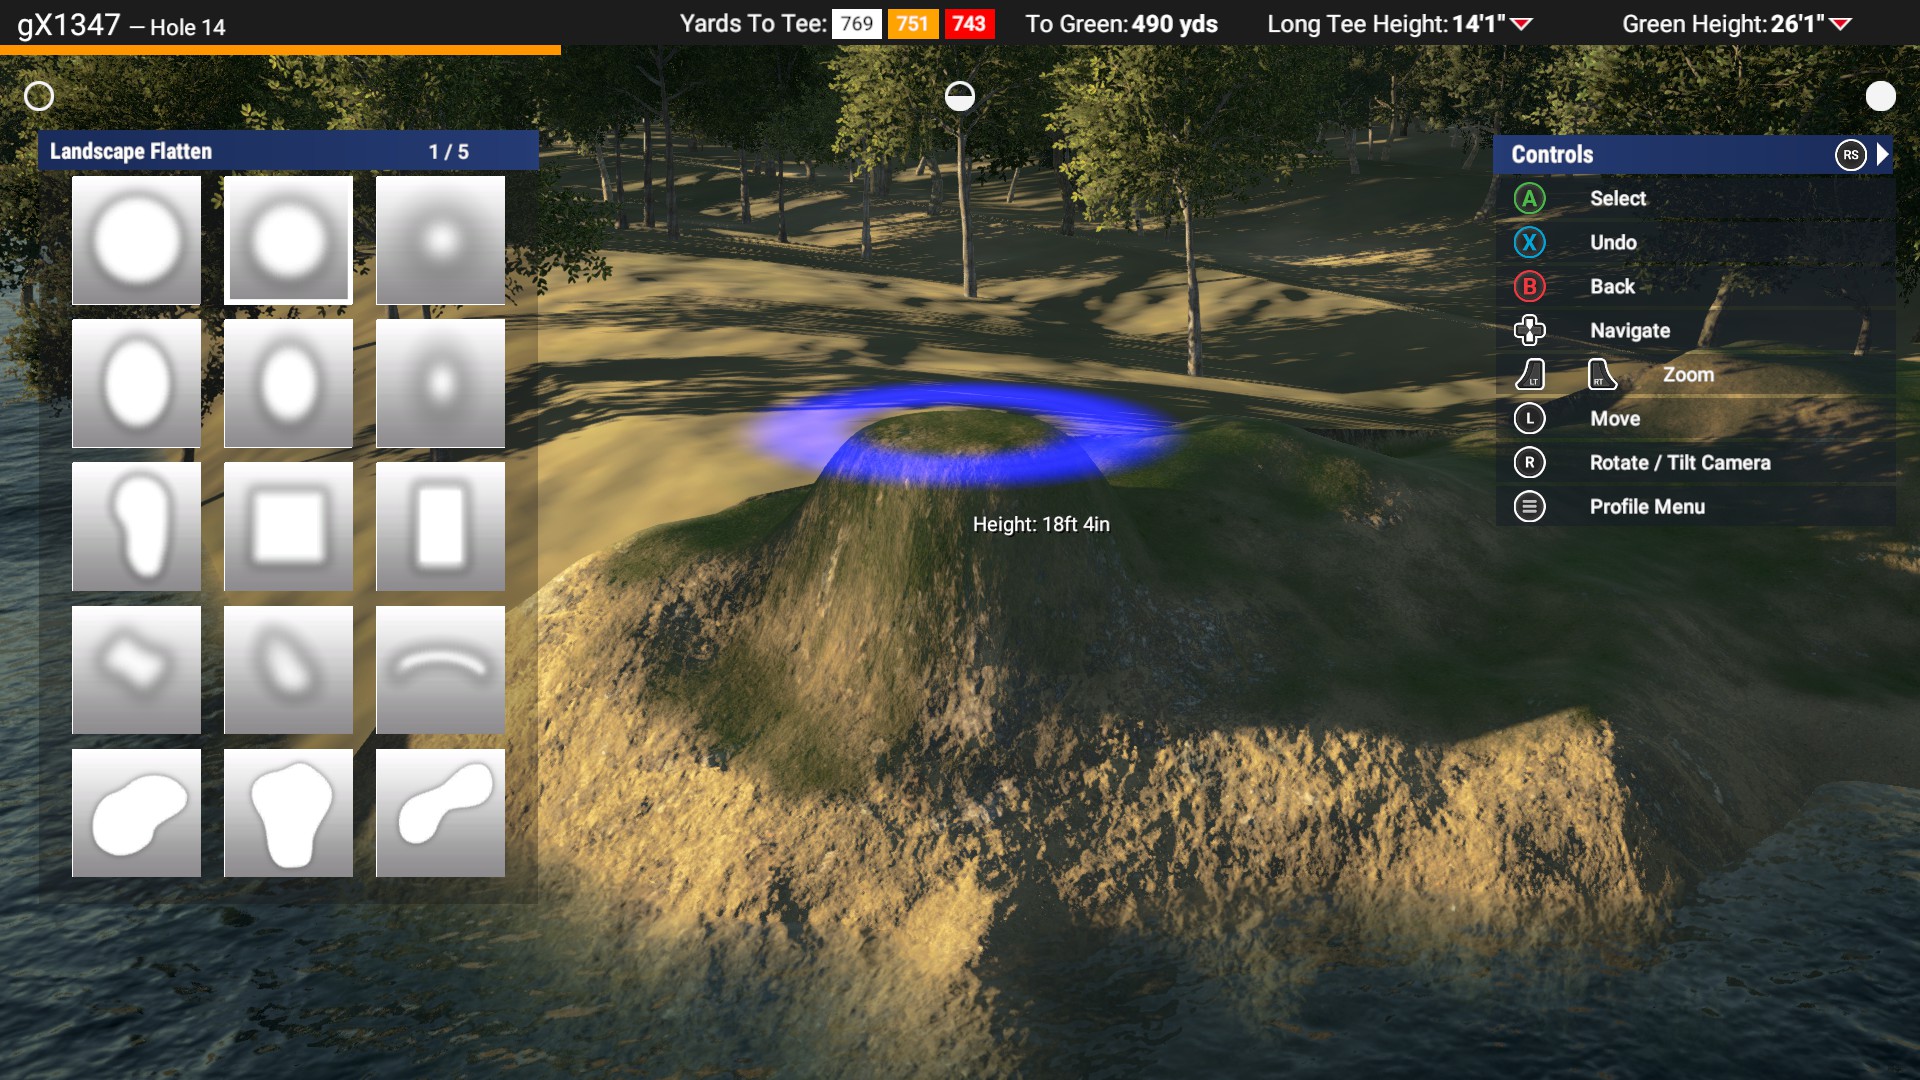 Third hardest (great for loads of things: flattening the areas just around pins at the end to make sure they aren't on inclines, for creating small/larger hills (using the raise tool), for flattening greens out whilst keeping some break. Just play around with this one): 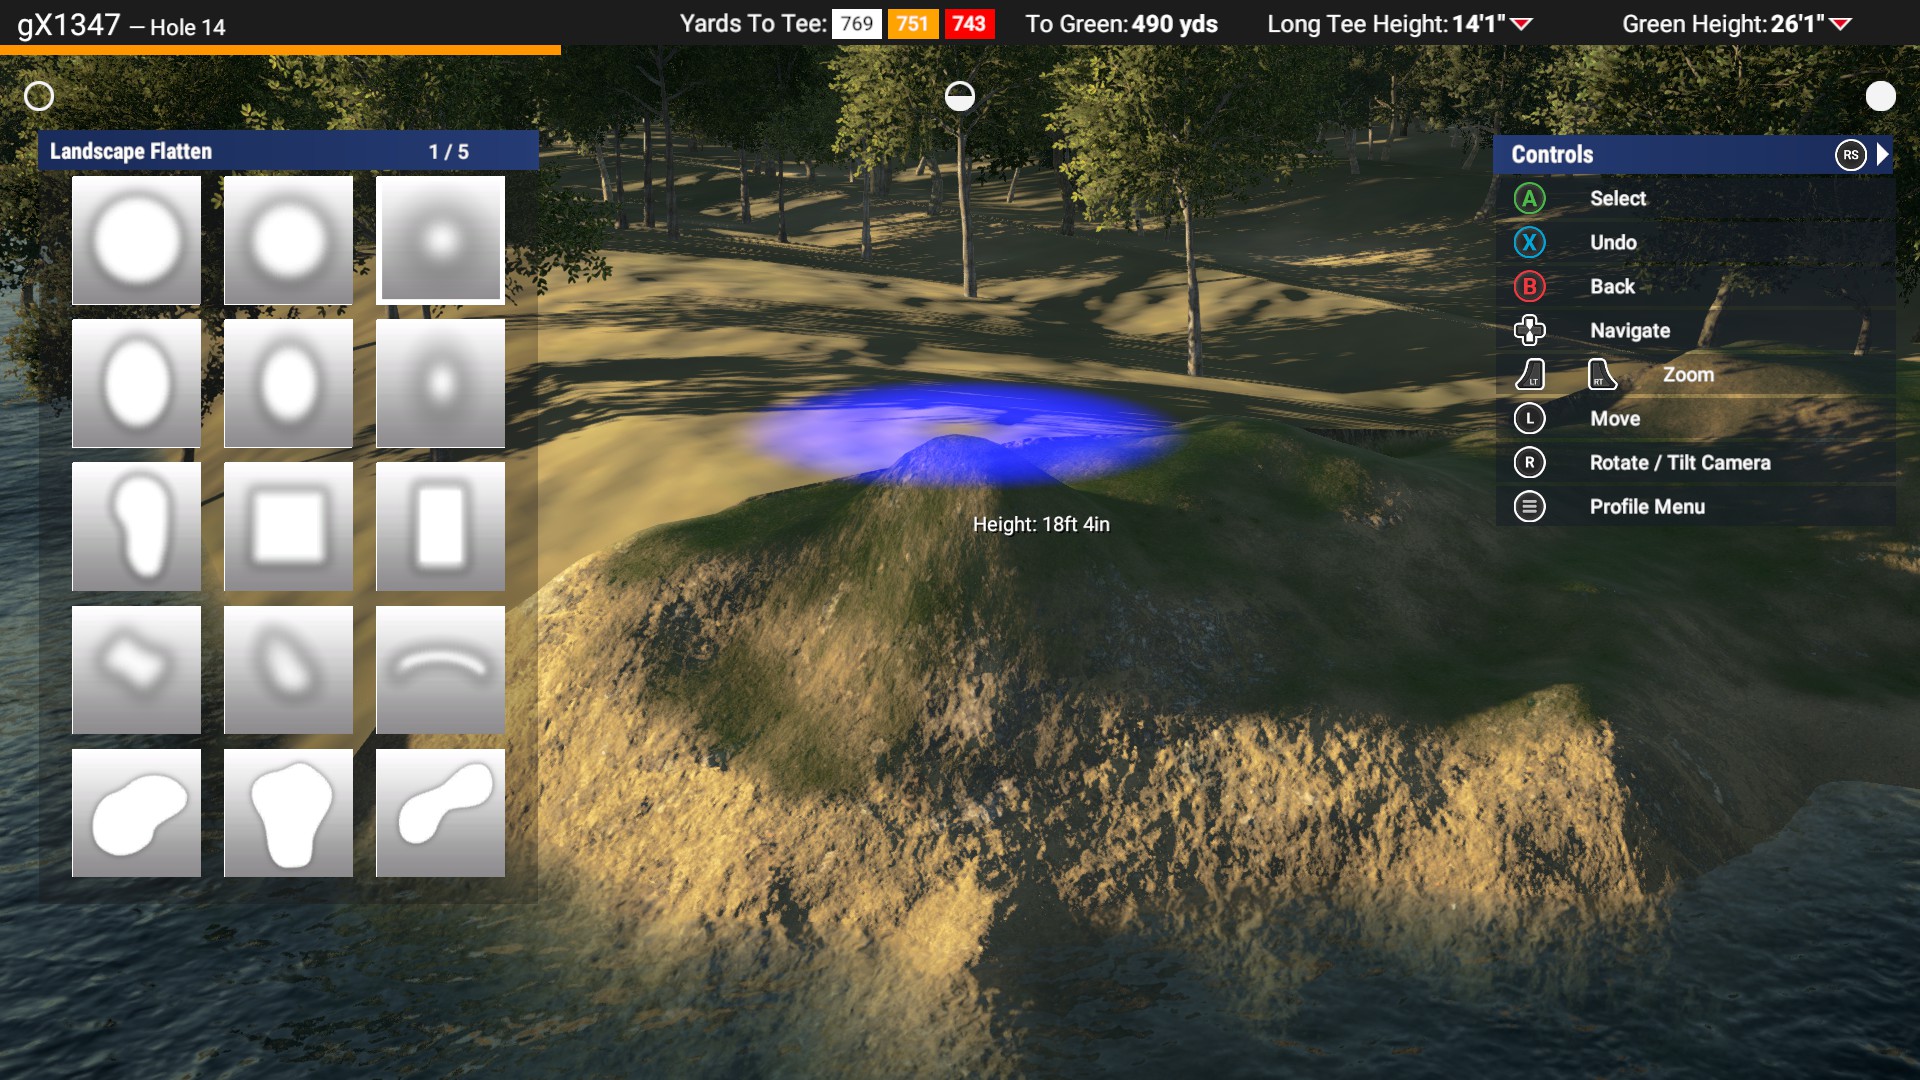 Softest (your most useful brush as everything is some degree of gradual. You will notice that not even the very middle gets close to the 18ft mark. This means it's perfect for flattening greens or fairways so that there is still some land movement, but it's more gentle): 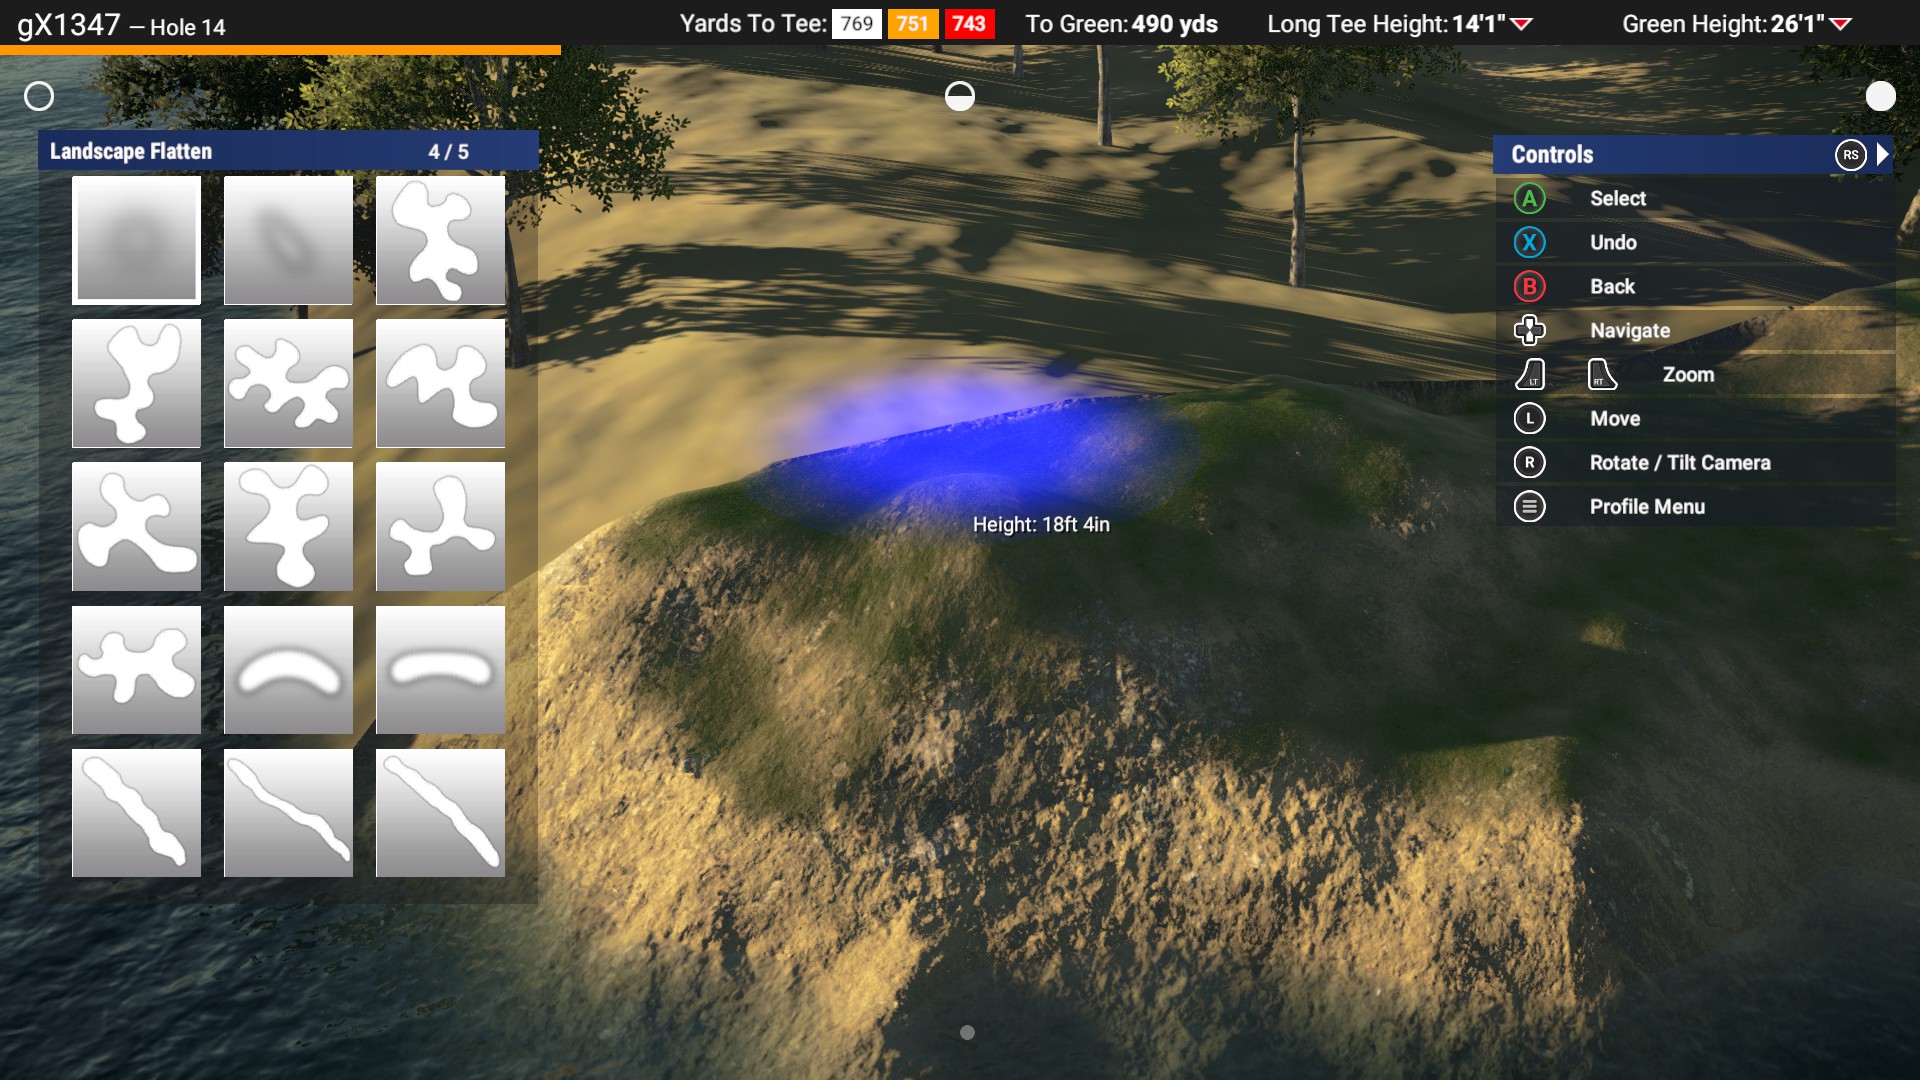 There's loads to learn with the brushes and just play around with them - I am still getting used to them as well, so my command isn't by any means perfect.
So, onto your specific question: As you've hopefully guessed, because you want a gradual slope, you'll take the fourth of those brushes (the softest). The trick with gradual slopes is to take your time, go very slowly and with small movements from high to low. Think of flattening in this way as 'pushing the gradient downhill' - you'll see it happen. I had one slope on my course that needed this a little (it's not too drastic a change, so figured I'd use as an example). Take soft fuzzy, set it to 0ft0 on landscape flatten and move it so that the darker circle in the middle is just on the green, then click once. Then move it slightly downhill (I tend to use a reference point of moving it the distance of half of that darker circle in the middle - i.e. if I'm moving it left to right, the left edge of the darker circle will be where the very middle was on the previous click). Then click. Move it a tiny bit downhill again. Then click. Rinse and repeat. Note that you may need to do this in multiple directions, so when that happens, go back to the top and start again in that different direction. You will also want to look at it from different angles to check that you haven't created any other weird slopes. One useful tip I would give is that it can help to move the lighting around so that you are in low light and looking towards the sun as you flatten (you can move it back after), as the lighting will help you see the contours better. So, before: 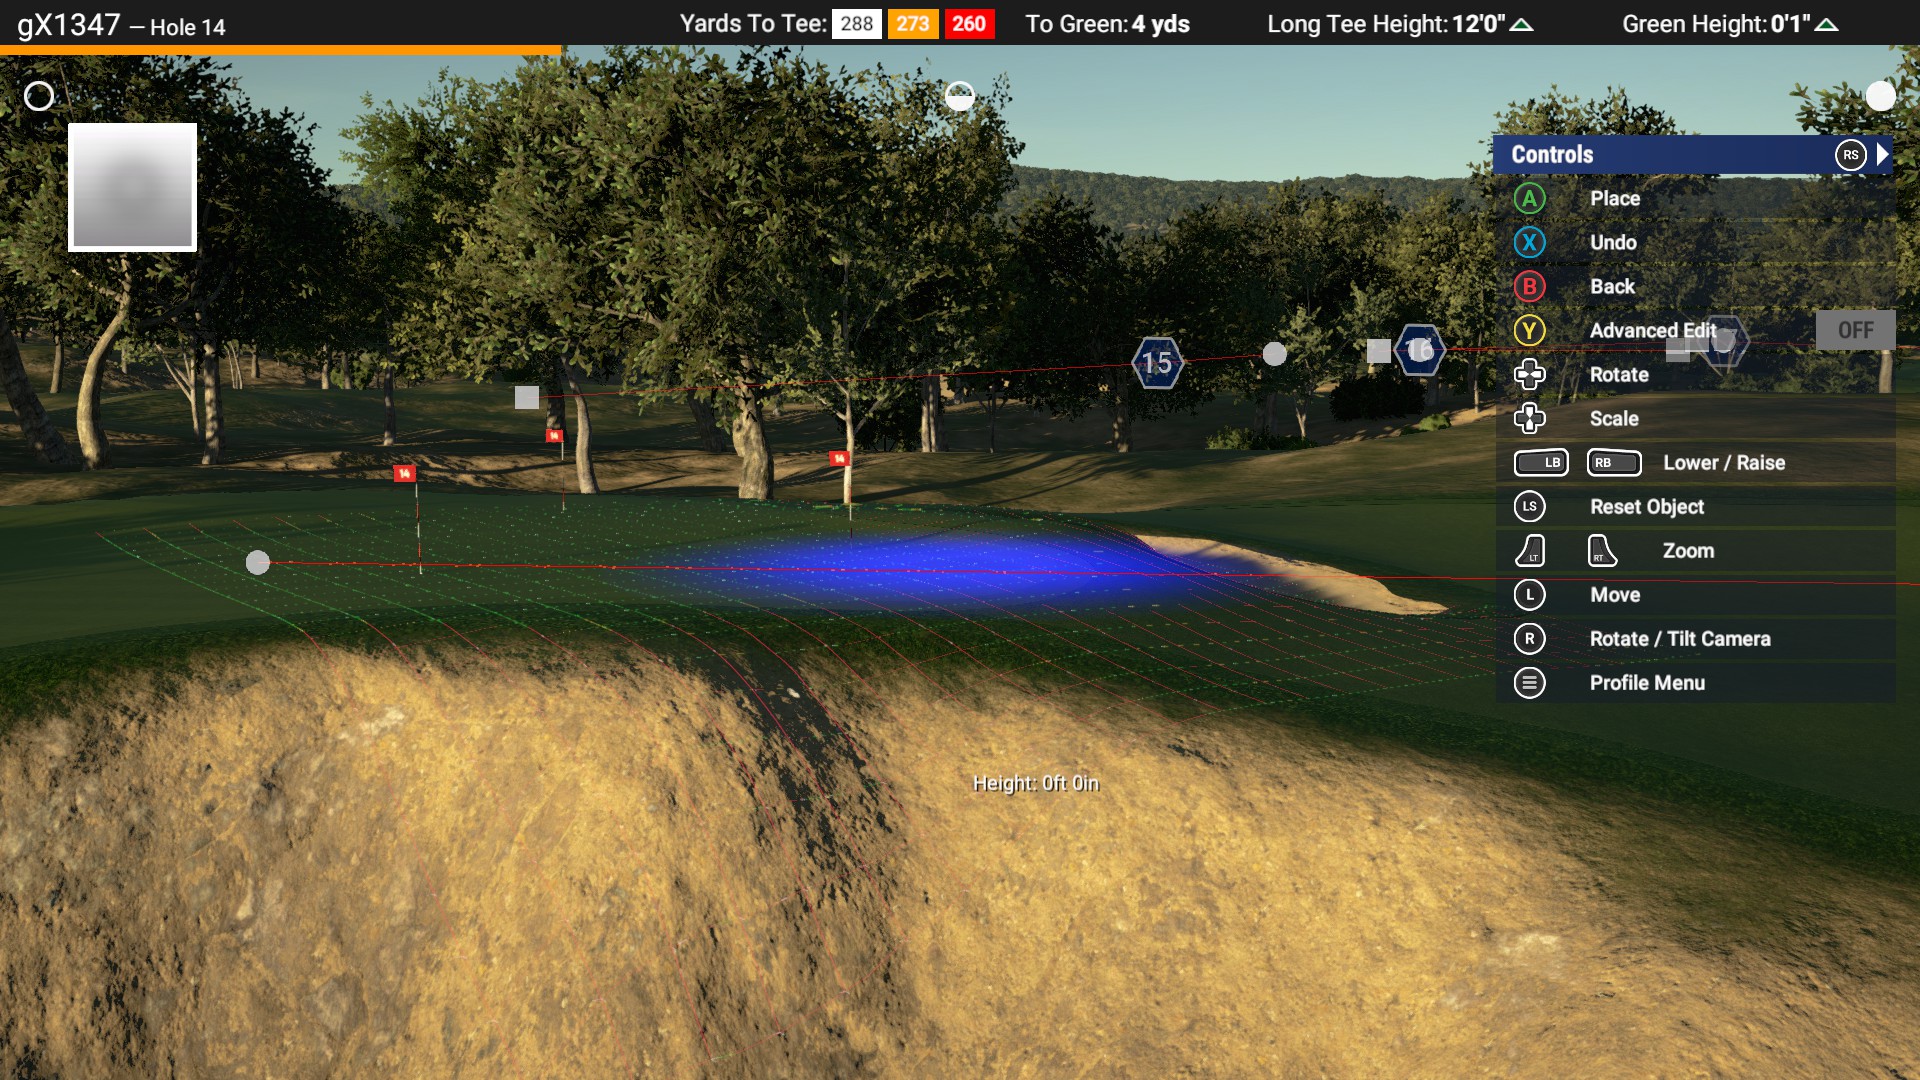 And after:  Not a massive change in this case, but the top of the slope coming onto the green is much more gradual and realistic now, which you will notice whilst playing. Hope this helps! |
|
Deleted
Deleted Member
Posts: 0
|
Slopes
Jul 28, 2019 7:29:25 GMT -5
Post by Deleted on Jul 28, 2019 7:29:25 GMT -5
B101 - Can you explain why you prefer the "move and click" method rather than just holding the button and moving (fuzzy brush only)? Both seem to do the same for me and the latter method is way faster.
|
|
|
|
Slopes
Jul 28, 2019 7:36:18 GMT -5
Post by b101 on Jul 28, 2019 7:36:18 GMT -5
B101 - Can you explain why you prefer the "move and click" method rather than just holding the button and moving (fuzzy brush only)? Both seem to do the same for me and the latter method is way faster. Move and click is much more precise IMO and seems to give more gradual change. Click and drag may well work at the beginning of a hole when you are just creating terrain (although, if that's the case, simply raising up with either of the fuzzy tools will be better), but this is neater once you are more 'locked in' to a hole as you can adapt where you click rather than just dragging and hoping (too strong a phrase, but you get the meaning). Basically, I prefer to see each change as it happens, rather than wait till the end and hope that it's worked as I wanted. It really doesn't take that long, either, although I agree that yours is much faster. |
|
Deleted
Deleted Member
Posts: 0
|
Slopes
Jul 28, 2019 9:41:24 GMT -5
Post by Deleted on Jul 28, 2019 9:41:24 GMT -5
Thanks for the response "b". I usually go over the slopes several times at zero elevation so the speed difference may not be that much.
|
|
|
|
Slopes
Jul 28, 2019 12:09:52 GMT -5
via mobile
Post by noahmoelter23 on Jul 28, 2019 12:09:52 GMT -5
b101 thanks! It will help me a lot
|
|
|
|
Slopes
Jul 28, 2019 12:34:59 GMT -5
Post by b101 on Jul 28, 2019 12:34:59 GMT -5
Just realised the 'before' photo was a complete duplicate of the 'after', so that was pretty confusing. Edited above.
|
|


